Instagram Instagram

Entries in baking (53)

Thursday
Oct082009

Of true affection

There is that saying about loving something enough to give it away, and if it comes back then it was meant to be.

I'm wondering if that applies to cakes, too. Specifically a Cinnamon Walnut Mud Cake.

I made this cake for a birthday celebration I was unable to attend. It was packed up with not even a crumb missing; an exercise in willpower and an act of true affection.

The next day a generous slice was brought back to me, with thanks, so that I could share in the festivities. I took this as a sign that not only was this cake meant to be mine, but it was also meant to be one I told you all about.

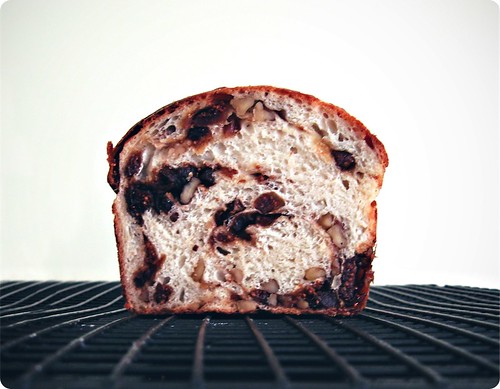
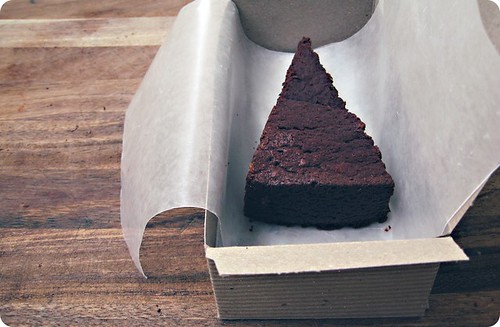
My friends, this cake deserves the chatter. As straightforward as they come in method, it is a melt-n-mix affair that was just right for a midweek birthday. Despite its brooding looks, the cake is has a surprising delicacy. A fudgy underside is layered with a cracked and crumbly, mousse-like top, with airy texture that immediately melts upon contact with the tongue. Bouncy for all of its darkness, like damp, rich soil that's made of chocolate and sugar instead of, well, dirt. Walnuts break up the crumb like supple pebbles.

I sent this cake out into the world with little expectation, and it returned as a gift for me. And while a selfish little voice my be murmuring somewhere in the corners of my mind, it is a gift I am happy to share.

Grab a fork and dive in.

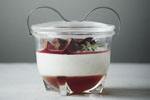
The box in the photo was made by simplesong designs, and is one of Suann's wonderful letterpresssed creations. Her store is full of treasures like these pencils, and her blog is a perfectly-curated collection of things that have caught her fancy, as well as her own beautiful projects (be sure to check out the adorable invitations to her son's birthday and the dinner party she recently threw for charity - it's stunning). She's just fab.

And to all my Canadian friends, Happy Thanksgiving!

Cinnamon Walnut Mud Cake
Those who appreciate the depth of chocolate might want to substitute 4 ounces of bittersweet for the same quantity of semisweet here.

Ingredients
8 ounces (2 sticks, 1 cup) unsalted butter plus more for greasing the pan
1 cup all-purpose flour
2 teaspoons baking powder
1/2 teaspoon ground cinnamon
1/4 teaspoon salt
12 ounces semisweet chocolate, chopped
4 eggs
1 cup dark brown sugar, packed
1 teaspoon vanilla extract
1 cup chopped walnuts, toasted and lightly salted while still warm
Cocoa powder, to serve

Lightly butter a 10-inch springform pan then line the bottom with a disc of parchment paper. Use strips to line to line the sides, pressing the parchment into the butter to adhere.

Preheat an oven to 350°F (175°C).

Sift or whisk together the flour, baking powder, cinnamon and salt in a small bowl. Set aside.

In a saucepan over medium heat, melt the 8 ounces of butter with the chocolate, stirring until smooth. Remove from the heat to cool slightly.

In a medium bowl, whisk together the eggs, sugar and vanilla. You do not need to blend them together terribly vigorously, just enough so that the sugar is dissolved. The mixture should barely lighten in colour and there will be a layer of bubbles at the surface but not throughout.

Pour the egg mixture into the chocolate, and stir to combine. Fold in the flour mixture, being careful not to overmix. Stir in the walnuts.

Pour the batter into the prepared pan and bake in a preheated oven for 35-40 minutes, or until the centre is puffed and cracked. A cake tester inserted into one of these cracks should come out with wet, clumped crumbs; gooey but not liquid. The cake will continue to cook as it cools, losing its crown and falling back upon itself.

Remove the cake to a wire rack to come to room temperature. To serve, release the sides of the springform carefully and remove the parchment paper. Dust the top with cocoa powder pushed through a sieve.

Makes one 10-inch cake, serving 16.

Notes:
• If I am being honest, even though I have directed to sieve together the dry ingredients in the recipe, I may have simply dumped those dry ingredients onto the wet without adverse effect. Shh. Don't tell.
• This cake likes to be handled with care. For ease of serving, chill the fully-cooled cake for around 30 minutes before slicing and it will firm up. It can be stored at room temperature for a day or two, but I prefer to keep it covered in the fridge.
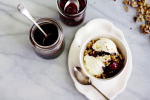
• A spoonful of sweetened sour cream makes an ideal accompaniment.

Thursday
Sep172009

Munched, gleefully


I failed. F-a-i-l-e-d. It was epic.

It was gnocchi.

Had you walked into my kitchen in the late-afternoon hours of Wednesday, September 16, 2009, you would have found me covered from hand-to-elbow with dough and in near exasperated tears, with every viable work surface buried under the detritus of my humiliation, my father at my side in a valiant effort to salvage the day, my husband on the phone patiently talking me down from my fit of pique and, in calm, even tones, assuring me that takeout would be more than fine for dinner.

I tell you, I can make gnocchi. Honestly. While not regularly enough to say often, I've made it enough times to consider myself passably adept. But this, this was a new, devil of a recipe. A recipe that wanted to take me down.

And boy, did it ever.

It went straight for the knees, pinned me to the mat and had me calling for Daddy. I won't go into too many details or point any flour-encrusted fingers, since I'm not entirely sure that the fault is that of the recipe or my own. Or a combination of the two. The blame may lie with the potatoes. Who knows.

I will tell you that the dough refused to come together in any semblance of a workable substance. I had a languid blob lounging smugly on my kitchen counter. No matter how much flour I fed it it would not be sated; it was still boundless, still a slowly-oozing, formless mass.

That's when I called in reinforcements.

We rallied, we prevailed. Somewhat. My father and I managed a handful of successful dumplings, those few sent into the boiling water, then tossed with softened butter and a handfuls of Parmesan. Optimistically, we each tried one.

It was a joyless mouthful. They tasted of defeat. Defeat and cheese.

So abject was I, I was tempted board up the kitchen and declare it all a lost cause. If it weren't for the Fig and Walnut Bread we had made earlier in the day, I might have scrapped any tattered remnants of faith I had in my culinary ability.

The bread was a riff on Julia Child's white bread that we make quite often, a fruit-filled version based on a combination of flavours I have done before. Enriched with milk and fragrant with honey, the sturdy crumb is the ideal sort to be wrapped around a swirl of dried figs, walnuts and the subtle, savoury presence of thyme. It is a bread to be cut into thick slices, toasted enough that you hear the fruit sizzle ever so slightly, slathered with sweet butter in lavish proportion and then munched, gleefully.

And we did exactly that, while we waited for the delivery man.

Fig and Walnut Bread with Thyme
Adapted from Julia Child's Homemade White Bread.

More than just saving my pride, the bread saved today - if it wasn't for the bread, I'd be here empty handed. And I hate to do that. So while this may have not been my intended offering, please accept it, with the admission that since this was an unplanned debut, I did not take notes as conscientiously as my usual. But we are all good enough friends that I hope that my best guess will suffice for now.

The loaf in question is already a thing of the past, and there has been another petitioned for the weekend; I will retry the recipe then, to double-check my recollection.

Saturday, September 19, 2009: I tested the recipe again last night, and made two changes - both pertaining to butter. I added the 2 tablespoons of butter to the milk/water mixture to reduce the number of steps, with no ill effects to the final bread. Surprisingly, I also decided it is better to forgo the smear of butter in the swirl since the fat causes the layers to separate, leading to loss of filling when the bread is sliced. Without the butter the dough gripped the figs and walnuts more firmly.

Ingredients
3/4 cup chopped walnuts
1/4-1/2 teaspoon fresh thyme leaves, chopped
fine grain sea salt, optional
1 cup water
1 1/4 cup milk
1/4 cup honey
2 tablespoons unsalted butter
1 teaspoon active dry yeast
6 cups all-purpose flour (or thereabouts)
2 teaspoons kosher salt
1/2 cup muscovado sugar or dark brown sugar
1 cup chopped dried figs
2 tablespoons unsalted butter, melted and cooled

In a medium skillet over medium heat, toast the walnuts for about 5 minutes, stirring often. Once the nuts are lightly-golden and fragrant remove immediately from the heat and into a bowl. Toss through with a sprinkling of fine sea salt, if using, and the chopped thyme. Set aside to cool.

In a small saucepan over medium-low heat, gently warm the water and milk. Add the honey, stirring to dissolve. Stir in the butter, heating gently until melted. The mixture should be warm, around 105-110°F. Pour liquids into the bowl of a stand mixer or a large bowl. Stir in the yeast and allow to stand for five minutes.

To the yeast, add 3 cups of the flour and the salt. With the dough hook attachment or by hand, mix to combine (if using a mixer, proceed on medium speed). Continuing to stir, add the remaining flour a little at a time, until the dough begins to pull away cleanly from the sides of the bowl; it should still be slightly sticky.

Turn the dough out onto a lightly-floured work surface and knead until smooth and elastic. The amount of time will depend on if you used a mixer or worked by hand, anywhere from 2-10 minutes. Place the dough in a large, lightly-greased bowl, turning the dough over to coat. Turn the dough right side up and cover loosely with plastic wrap or a tea towel. Set bowl in a warm, draft-free spot to rise until doubled in bulk, around 2 hours.

Butter two 8-by-4-inch loaf pans and set aside. Punch the dough down gently, then divide into two equal portions on a lightly-floured work surface. Taking one ball, roll out to a rectangle around 9-by-12-inches. Sprinkle half the sugar over the dough, leaving a thin border at all sides. Repeat with half of the figs and half of the toasted walnuts.

Start rolling the dough from the short end, forming a tight cylinder, pinching the seam together to seal. Bring just the edge of the ends of the roll up to enclose the sides and pinch to seal. Place the dough into one of the prepared pans. Repeat process with the second ball of dough.

Cover loaves loosely with plastic wrap or with tea towels, and allow to rise in a warm spot until doubled again in bulk, around 45-60 minutes. Preheat an oven to 375°F (190°C).

Brush the loaves with the remaining melted butter, and bake in the preheated oven for 35-40 minutes. The bread is done when it is golden brown and sounds hollow when tapped from the bottom. Turn loaves out immediately onto a rack, turning them right side up to cool.

Makes 2 loaves.

Notes:

• It is best to use a mild honey here, nothing with so much presence that it overshadows the mellow sweetness of the figs.
• Raisins, dates or dried cranberries would all be good substitutes for the figs, and resh rosemary for the thyme.
• For a straightforwardly-sweet filling replace the thyme with a generous sprinkling of cinnamon. Feel free to be generous with the muscovado as well.
• I scatter the figs and walnuts somewhat erratically; I think the uneven distribution results in a more interesting loaf. If you want a perfect coil of filling, be more precise.
• Zoë has a helpful photographic step-by-step of how to roll such breads on her (lovely, inspiring) site. Any of the doughs she mentions would be a fine match for this filling.

Thursday
Sep102009

To be prepared

When I first begin to get sick, I begin to clean. Ambitiously.

It's not just scrubbing dishes or sweeping the floors or folding the laundry. It's cleaning the windows and flipping the mattresses and vacuuming under the fridge. When my mind is fuzzy with sickness, I can't stand a similar feeling of clutter in my surroundings.

It drives me bonkers. But at least, in the best of circumstances, my fits of crazy result in cookies.

Last Tuesday I organized the closets. Most specifically, the Closet We Dare Not Open. That's the closet in our little den, a stash and dash repository, the closet that still had sealed boxes from when we moved to this house two years ago.

Yes, you heard me right. Sealed boxes. And yes, it has been two years.

Don't look at me like that. You try moving with a toddler when you're already expecting your next and let's see how well you do in getting all your boxes unpacked.

Ahem. Now that we've thrown open the quite literal door on my secret shame, back to the present. And those boxes. These were the boxes of nonessentials - the last boxes we'd packed from our previous house, thrown together as we made our way out the door.

In one I found a storage container (empty) for CDs, an unopened package of paper, a sketchpad and some dice. In another, pictureless fames and ice cube trays. And in another, I found my recipe notebooks.

The pair of books, pale slate with Prussian blue trim, date back even further than the move to this house. They are from A Time Before; the time before a ring had ever been put upon my finger and before my child had ever been placed in my arms. A time before I started writing here.

My Mum had recipe folders when I was growing up. She'd snip out and tack in recipes from magazines and newspapers, these interspersed with handwritten cards bearing the bosom-held secret recipes of family and friends. Hers were fat and full with both the memory and the promise of delicious meals.

When I decided I it was time to become an adult, I started my own recipe notebooks. It seemed the Thing to Do. I'm a gatherer by nature, and had a considerable stockpile of magazines and notepads full of material ready and waiting. I remember stacking the clippings into neat little piles, considering my methods of categorization. I had Breakfasts, Soups, Salads, Breads, Sides, Vegetarian Mains, Meat, Poultry, Cakes, Pies, Frozen Desserts and Sweets. (All of this compulsion fell neatly in line with my established addiction to stationery.)

I was ready, at least recipe-wise, for Sort of Life I was Going to Lead. My books were as much a compilation of tried recipes as it was of the recipes I wanted to try in that future. I was going to be prepared.

Prepared for everything except baking cookies. In curating these books, I overlooked cookies entirely. Filled anticipation for future dinner parties that would surely require an elegant sweets course, I hopped, skipped, and jumped my way past biscuits and wafers and biscotti. The closest I come to a cookie is the solitary mention of brownies.

I think I thought that cookies were dull. I know. I was young and stupid. Cookies were one of the first things I'd learned to bake, due in large part to Mrs. Wakefield and those bags of morsels, and I believe I had the fool idea that adulthood was the time to move on from such childish pursuits.

Thank goodness for being lazy. And in love. I started those books years ago, but I never finished them. They went into the back of a closet, moved from apartment to apartment to house to house, untouched. Instead of collecting, I started cooking, and the next thing I knew I was here.

And the person that is here is a mum who bakes cookies. Often.

A move to rectify the lapse in those books' the cookie section is long overdue, and I have already got my choice for the first one in. These Chocolate-chunk Oatmeal Cookies with Pecans and Dried Cherries are sigh-inducing balance of sweet, salty and subtly sour. They are speckled and nubbly, with a crisp rim and a soft centre, and deep cracks that travel their surface. And oh my stars, they are perfectly delicious. So delicious that they deserve a fan club.

We can have the meetings at my place. Once I'm done cleaning.

Chocolate-chunk Oatmeal Cookies with Pecans and Dried Cherries
From Cooks Illustrated published May 2005.

Ingredients
1 1/4 cups unbleached all-purpose flour
3/4 teaspoon baking powder
1/2 teaspoon baking soda
1/2 teaspoon salt
1 1/4 cups old-fashioned rolled oats
1 cup pecans, toasted and chopped
1 cup dried sour cherries or cranberries, chopped coarse
4 ounces bittersweet chocolate, chopped into small pieces about the size of chocolate chips
3/4 cup (12 tablespoons, 1 1/2 sticks) unsalted butter, softened but still cool
1 1/2 cups packed dark brown sugar
1 large egg
1 teaspoon vanilla extract

Preheat oven to 350°F (175°C), with racks on the top and bottom thirds. Use parchment paper to line several standard baking sheets and set aside.

In a bowl, sift together the flour, baking powder, baking soda and salt. Set aside.

In another bowl combine the oats, pecans, dried cherries and chocolate.

In the bowl of a stand mixer with the paddle attachment, or with a hand mixer, cream together the butter and sugar on medium speed until light and fluffy, scraping down the sides of the bowl as needed. With the mixer on medium-low, add the egg and beat until incorporated.

Scrape down the sides of the bowl, turn the mixer down to low, and add the flour mixture to the bowl. Stir until just combined. Finally incorporate the oats, nuts, fruit and chocolate. Do not overmix. Turn off the mixer and use a rubber spatula to give the dough a final stir and make sure that all the ingredients are incorporated.

Using an ice cream scoop to measure 1/4 cup portions of dough. Roll these portions lightly between your hands, then place 8 on each baking sheet, spaced evenly. Wet your hands and lightly press the dough to a 1-inch thickness. Bake the cookies, two trays at a time, in a preheated oven for 12 minutes. Rotate the trays top to bottom and back to front and bake for another 8 minutes or until the cookies are uniformly golden, but still wet in the middle. You might think that they're undercooked, but you're wrong - resist the urge to overbake, they will set up further as they cool.

Remove from the oven and cool on the baking sheets for 5 minutes before transferring to a wire rack. Store cooled cookies in an airtight container at room temperature.

Makes 16.

Notes:
• Although the original recipe specifies table salt, I used kosher salt instead; I enjoy the uneven saltiness of kosher in cookies, but that is only a personal preference.
• Continuing on the topic of salt, I sprinkled the pecans with some fine grained sea salt when they were toasted. This subtle salinity hummed steadily beneath the complexity of the chocolate and cherries.
• Wanting a slightly more modest cookie, I divided the dough into 24 and reduced my cooking time accordingly.

Thursday
Aug272009

Nuzzle in close

IMG_07752a

I have been thinking about this Buttermilk Pudding Cake for quite some time. When I saw it's photo, with those carmine-coloured berries all snuggled up against a cushion of tender, melting cake, the image stuck with me. It looked like all things dreamy, served up on a spoon.

Nevertheless, with such a short ingredient list, the skeptic in me raised a singular eyebrow - something the actual me cannot do without looking oddly quizzical or slightly pained. Could such a meagre collection of ingredients really amount to a dessert that lived up to its looks?

Oh my yes. If I was not blissfully married already, I would be writing Mrs. Tara Buttermilk Pudding Cake over and over in notepads, with hearts all around. I might whittle a million pencils down to the tiniest of nubs, and my hands could cramp, but I wouldn't care. Not at all. I am head-over-heels lost over this cake.

After getting all your bits and bobs in order, this is a cake that takes all of five minutes to make (with a mixer, a little longer by hand), but tastes exponentially better than the effort it requires. After stirring and whipping the disparate components, they are folded together into a marshmallow-tender batter. It sighs and slips its way into a pan, baking gently until pouffed on top and turned luscious below.

The only gentle suggestion I might offer would be to switch the raspberries for fresh peaches, as around here, raspberries are terribly last month. We live in peach-growing country, and at present the trees are heavy with their weight. For this, you want the ample-bosomed variety, full and soft, with a velvet skin that begs you to nuzzle in close and get a bit familiar. That yielding flesh mimics the softness of the cake's custardy belly, in delicious repetition.

And now that you have been formally introduced I do believe you should give this cake a thought as well.

If you require more reason than the case I have laid before you, you could be like me, and take my unabashedly shameless excuse, disguised under a flimsy veil of altruism. First, agree to make a recipe for a loved one that requires buttermilk, then accidentally-on-purpose purchase more buttermilk than said recipe requires. Wait a few days. Finally, choose a quiet afternoon to nobly bake the aforementioned Buttermilk Pudding Cake, as you wouldn't want the excess to go to waste.

Wink, wink, nudge, nudge. Everybody wins.

On a personal note, I want to dedicate this post to the talented and breathtakingly-honest Jess. She mentioned elsewhere that this dish took her fancy, and as she's been through more in her 28th year than many go through in decades, the least I could do is offer her something that might make her smile, as if to say - "We're so glad to see you on the other side."

IMG_07942A

Buttermilk Pudding Cake with Maple Sugar Peaches
From Gourmet.com, with minor changes. As you can see from the telltale marks on the dishes, this cake soufflés beautifully in the oven, but collapses quickly upon its removal from the heat. For the prettiest presentation, I would take the cake straight from oven to table in its fully plumped glory, then cruelly make your guests wait as it cools.

Ingredients
4 medium peaches, sliced into 1/2 to 3/4-inch wedges (or thereabouts)
2-3 tablespoons maple sugar or equal amounts of maple syrup
Softened butter for greasing the pan
1/4 cup all-purpose flour
1/4 teaspoon salt
1 1/3 cups well-shaken buttermilk
4 tablespoons (1/2 stick) unsalted butter, melted and cooled
3 large eggs, separated
2/3 cup granulated sugar, divided

In a medium bowl, gently stir together the peaches and enough maple sugar or syrup to sweeten to taste. Allow to macerate at room temperature while preparing the cake.

Preheat an oven to 350°F (175°C). Lightly butter the inside of a 1 1/2-quart shallow baking dish. Set aside.

In a large bowl, whisk together the flour and salt. In another mixing bowl, whisk together the buttermilk, butter, egg yolks, and 1/3 cup granulated sugar until well combined and the sugar is pretty much dissolved. Add the liquids to the flour mixture, stirring until just combined. Set aside.

In a large mixing bowl, either by hand or with a mixer, beat the reserved egg whites on medium speed until frothy and opaque. Increase the speed to medium high, or if by hand beat faster, and start adding the remaining sugar a tablespoons at a time, beating well to incorporate each addition. Continue whipping the egg whites until they just hold a stiff peak. Do not over beat.

Working quickly but gently, stir about one-third of the egg whites into the prepared batter. Once almost combined, add another third of whites, this time folding the batter over the whites to incorporate thoroughly. Repeat with the last of the whites.

Pour the batter into the prepared baking dish, place this dish in a larger dish or roasting pan, and pour hot water from a recently-boiled kettle in the larger pan until it comes halfway up the sides of the smaller. Bake the cake in this water bath in the preheated oven for 4- to 50 minutes, until puffed and golden. Remove from the oven and allow to cool 5 to 10 minutes before serving with the peaches alongside.

Serves 6, but I would really think 4, greedily, is the way to go. Sharing is difficult with this one.

Notes:
• I used Brien's superfine maple sugar, which has lighter taste than others I have tried, with an understated sweetness rather than that throat-warming hit associated with maple syrup. I further preferred maple sugar over syrup as it seemed to draw more juices out of the peaches, and thickened those juices only slightly.

Thursday
Aug132009

Glowed in my mind

I used to have a particular prejudice against banana cream pies. When I thought of them, I thought of flabby pastry barely-restraining globs of pudding soused with imitation banana flavouring and topped with mounds of cotton-candy-sweet cream. I assumed their only use was as the punchline to a gag; the projectile of choice for one clown to toss squarely into the pucker of another - most likely right after they had exited the confines of a very small car. Discarded pie everywhere, the crowd erupts in riotous laughter.

That is what I thought of banana cream pies.

As with most prejudices, mine was not rooted in much reason. Save for an encounter with some aggressively-flavoured banana pudding I had at a friends house as a child, I do not think I have ever tried anything remotely associated to a banana cream pie. Banana bread, we're old acquaintances. But banana cream pie and I were pretty much strangers.

Most often I see it offered against the gleaming expanse of diner counters, on mile-high cake stands, with its pristine swirls captured under a glass dome. I am almost enticed. But then my wandering eye catches glimpse of Banana Cream's sibling Coconut or its dreamy cousin Chocolate, both equally (and moreso) tempting. There's no contest. It hardly needs saying that my preference consistently falls with the the latter.

My dear friend, all of that is in the past. For now I am a full-fledged, card-carrying convert.

These past few days, I have had reason to feel thankful. Thankful in a way that makes you feel lucky. That makes you feel cared for. That makes you feel light. I have had good reason to feel crazy as well, but the thankful part far outweighs all of that nonsense.

I wanted to bake something for those responsible for some of that gratitude, to wordlessly express how much their efforts were appreciated. I feel like a Wednesday is a fine reason to celebrate when they are around. With book laid open, the recipe for banana cream pie grabbed my fancy and would not let go; the notion of a proper pie just about glowed in my mind with projected nostalgia.

So I baked my first banana cream pie. And what did I learn?

I learned that banana cream pies can be sublime. Now that is an often-used word when it comes to dessert, but a more apt description would be hard to find. This pie is worlds away from any of my preconceived notions. Crisp pastry cradles slices of ripe banana layered with smooth, spiced custard. The fruit and pastry cream are meltingly supple, melding into one, singular, wonderful texture. Atop all of this a cloud of heavy cream, barely whipped and barely sweet, tangy and bright with the addition of some sour cream.

If you are going to have a banana cream pie, please take my word and make it this one. This pie is not for throwing.

Banana Cream Pie
From the book Baking: From My Home to Yours (Houghton Mifflin Harcourt, 2006) by Dorie Greenspan. A modern classic, this book is one of my most reliable resources - I have never been disappointed by a recipe. My family will heartily attest to that.

Recipe

Notes:

• I used dark brown sugar instead of light brown sugar in the filling as that was all I had on hand. The resulting custard had a deep, rich caramel flavour; its colour was a bit muddied, but we didn't mind.
• I added a good pinch of ground ginger to go along with the cinnamon and nutmeg.