Instagram Instagram

Entries in baking (53)

Thursday
Jun112009

The audacity to promenade

trio

So here's my trouble. I wanted to tell you about Martha Stewart's Cupcakes (Clarkson Potter, 2009). To chat about my impressions, my likes, my dislikes, the nitty gritty details of this cookbook devoted to the small.

But my attention has been captured by someone small, a small one who is getting bigger every day. Happy Birthday to you, our William - today is your first, and I can hardly find the words.

All week I have been vacillating between my heart bursting with pride and my chest tightening with emotion. Such is the state of Mummyhood. The First Birthday is an event met with a mile-wide grin and cheers of joy tempered with the sob-sniffle-wail of "my goodness, this is all too fast."

And fast it has been. Our Littler Man is walking.

William took his first tentative steps a few weeks back, and has now fully embraced the notion of upright locomotion. The rapid-fire thwack of his hands and knees on the floors of our home has been replaced with the padded rhythm of confident footsteps. And confident he is, as Will is not one to toddle.

In a manner unsurprising to anyone who has met him, our William has the audacity to promenade. His walk is so spirited, his step so lively, there is most surely a song in his heart.

Oh there now, I've digressed into ridiculous levels of Proud Parent Mode. My apologies.

Where was I? Oh yes, cupcakes. With William's first 1st birthday party planning underway, Martha Stewart's Cupcakes was a wealth of imaginative cake ideas, all on a scale befitting the occasion. Silly me though, I put Benjamin in charge of selecting the flavour to try - and again as my children are nothing if not consistent, he chose the most basic of recipes, chocolate upon chocolate.

But his choice was surprisingly astute, as our previous favourite chocolate cupcake was the One Bowl Chocolate Cupcakes from Martha Stewart's Baking Handbook (Clarkson Potter, 2005). Now One Bowl Chocolate Cupcakes are in the new book, but it is a different recipe.

So it was settled, the dessert menu chosen for our celebration. The recipe itself warrants little description; it is a standard cocoa and buttermilk cake, with only a scant amount of oil. The method is as demanding as a boxed cake, with the dry ingredients whisked in a bowl, then the eggs, buttermilk and oil poured over. A few stirs, and it is done.

This recipe yields cakes that look the example of cupcake perfection; each rose with the same rounded cheek, bulging slightly at their edges but with a gentle slope. Best of all was their colour - a true, dark brown, exactly how a chocolate cupcake should look.

As we did not have the recipes side-by-side for comparison, we had to rely on (unreliable) memory for our verdict. While everyone enjoyed the cupcakes, they were not met with the same knee-buckling adoration of the previous version. When I first made the Baking Handbook incarnation of One Bowl Chocolate Cupcakes, I recall thinking that these were simply the best cupcakes ever. This time, not so much. They were good, but not exceptional.

It should be said though, that I am terribly finicky about my chocolate cakes so it takes a good deal to impress. While I shrugged at the taste, there was nary a complaint from our guests. Approximately 5 minutes after the Happy Birthdays and candles blown out, there were quite a few happy faces smeared with whipped ganache frosting.

While my personal assessment of the cupcakes was lackluster, my overall impression of the book from which they came is not. I did not test many recipes from the book (honestly, even I can only eat so many cupcakes) as I would have liked, but I can tell you that the book Martha Stewart Cupcakes is full of fun.

There is an obvious, infectious merriment in the way that the subject matter is treated, and the variations on the theme simply make me smile. One cannot help but be made a bit happier by pages upon pages of sprinkles and gumdrops, marizpan ladybugs, and coconut-feathered chicks.

What's more, the cookbook is inspiring. Ingeniously, the book pushes the boundaries of cupcakery to include all manner of small cakes, and even cookies and meringues, as long as they are baked in that distinctive shape.

There are filled cupcakes, layered mini-cakes, cookie-crusted cheesecakes, and simple pound cakes. Not all cakes are frosted, such as the Tiny Cherry and Almond and Pistachio-Raspberry teacakes, making these gems the ideal everyday treat to be tucked into lunchboxes or enjoyed as an afternoon snack. The combination of flavours, specific decorating techniques and helpful guides (including clip art templates) could all be adapted and developed to suit your specific tastes, and could be applied to the creation of full-sized cakes.

One caveat, as with Martha Stewart's Cookies (Clarkson Potter, 2008), much of the content included in Martha Stewart's Cupcakes has been previously featured in the various publications of Martha Stewart Omnimedia. Personally, I enjoyed having the recipes available in a single source, but others may disagree and might have preferred a wholly originally collection.

Time to get back to the business of being Mum to a 3-year-old and a 1-year-old. Oh my. So big. So fast. So wonderful.

Happy, happy day.

One Bowl Chocolate Cupcakes
From the book Martha Stewart's Cupcakes.

Recipe

crossed lines
More photos from this series shot by my brother and sister-in-law can be seen here.

Now you didn't think that I'd forget to announce the winner of our Martha Stewart Cupcakes giveaway, did you?

Without further wait, Mr. Random.Org took the honour of selecting our winners, as follows.

The First Prize Winner will receive one copy of the Martha Stewart Cupcakes and one copy of Martha Stewart Cookies:
Chocolate Shavings

The Second Prize Winners will each receive a copy of Martha Stewart Cupcakes:
Dor and Michelle R.

I would like to thank everyone who entered, and highly recommend the checking out the fantastic conversation taking place in the comments section. To the winners, please e-mail me at tara [at] sevenspoons [dot] net, with your contact information at your earliest convenience.

Thursday
May142009

As often as I should

If I close my eyes, I can conjure up the memory of my father sharing dried figs with my brother and me when we were little.

I cannot see Dad but I know he's there. We are rather young, as the image in my head is of our childhood home and not the house we moved to in later years. The edges of are a bit fuzzy, and the details are not all there. It is a moment tied to nothing specific, really. For all I know, it is not just one moment, but instead the layered culmination of the countless times we snacked on the honey-sweet fruit. But when I think of dried figs, I think of back then.

Those figs were plump hockey pucks, squat with fat, golden cheeks. Slightly flattened on top and bulging at the sides, speared through their centres and strung together like a wreath. You had to pry them apart from their neighbours, each bearing the impression of the next. Their skin was wrinkled and tough, resistant to be bitten, but giving way to the jammy pulp, gritty with seeds in the most delicious way. Sugary sand. They were toothsome, and as far as I was concerned, the only way one ate a fig.

It sounds silly to say, but I do not think of dried figs as often as I should. More often than not I am distracted by the lures of the fresh variety. Fresh figs are foxy little minxes. On the outside, they are mysterious and musky, with soft skin ranging from the palest green to the deepest black. On the inside, they reveal a flesh that can boast a strawberry blush or a claret stain. They are tempestuous, with only a brief window when they're are at their glorious, ripe peak. After that, it is a steep decline into decay, and the utmost despair.

To be frank, fresh figs are sexier; tearing one open feels like an act of abandon.

But dried figs are making a comeback around here. You see, dear reader, I am wholly besotted with figs that (for the sake of clarity) could be called semi-dried. They were labelled dried in the market, but are a whole other personality than those that I remember from years ago. These tawny darlings retain their flat-bottomed teardrop shape, but their taste is more concentrated than fresh; a deeply resiny, sticky sweetness is found beneath the only-slightly leathered skin. Truly figgy, through and through.

When I came across a recipe for Rosemary Raisin Pecan Crisps, my first thought was "yum!" as it is no secret that I am known to snack now and again. My second thought was "FIGS" all uppercase and grand, as I set about the task of integrating my new crush into the cobblestoned crackers. Swapping out walnuts for pecans as that was what was on hand, and thyme for the rosemary, the crisps were easily adapted to my fancy. The method is simple, requiring pretty much one bowl and a double-bake process similar to biscotti.

The result, a golden stack of crisps as beautiful as Moroccan tiles, each a mosaic of nuts, seeds and fruit. Unforgettably good.

Fig and Walnut Crisps

Adapted from Julie, with thanks.

Ingredients
softened butter for greasing pans, or nonstick spray
1/2 cup chopped walnuts
1/4 cup pepitas (green pumpkin seeds)
1 1/2 cups all-purpose flour
1/2 cup whole wheat flour
2 teaspoons baking soda
1 1/2 teaspoons salt
2 cups buttermilk
1/4 cup brown sugar
1/4 cup honey
1 cup coarsely-chopped dried figs
1/4 cup shelled sunflower seeds
1/4 cup sesame seeds
1/4 cup flax seed, bashed about in a mortar and pestle or pulsed in a spice grinder
2 teaspoons fresh thyme, chopped

Preheat oven to 350° F. Lightly grease two 8-by-4-inch loaf pans, or spray with a nonstick spray.

Spread the walnuts and pumpkin seeds on a baking sheet. Roast in the oven, stirring occasionally, for about 7-10 minutes until fragrant but without much colour. Remove from the baking sheet and into a bowl, then set aside to cool.

In a large bowl, sift together the flour, baking soda and salt. Add the buttermilk, brown sugar and honey and stir until combined. Add the reserved nuts and remaining ingredients and stir until just blended.

Pour the batter into the prepared pans. Bake until golden and puffed, about 45 minutes. When touched, the loaves should spring back immediately. Turn the loaves out of their pans to cool completely, right side up, on a wire rack.

The bread is easiest to slice when fully-cooled. Leave the loaves to rest at room temperate for a few hours or, following Julie's suggestion, once cooled wrap them well in clingfilm and pop them in the freezer. Once frozen, slice the loaves as thin as you can and place the slices in a single layer on an ungreased cookie sheet.

Reduce the oven heat to 300° F and bake them for about 15 minutes, then flip them over and bake for another 10 minutes, until crisp and deep golden. Cool completely on a wire rack, then store in an airtight container.

Makes about 8 dozen crackers.

Notes:

• I used a particularly robust dark honey, which caused the loaves to brown a bit quicker than expected. This was not a problem, but something to keep in mind. In the future, I think I will use a lighter honey, not only for the browning but also for a more subtle taste.
• Next time I make these (and there will most definitely be a next time), I am planning on using miniature loaf pans for a two-bite size.

Thursday
May072009

Almost there

I love a good backyard.

Don't get me wrong, a front yard is a wonderful thing. A front yard, and specifically a good front porch, is the place to watch the world go by. It is see and be seen territory, the perfect vantage point to watch the life of your neighbourhood play out in front of you.

In childhood, a front yard is where you meet your friends. Its the soccer field and the skate park. And, in my personal experience, the backdrop for Barbie-related-dramas.

In University the front yard was home to the living room couch, yanked from its indoor confines and released to the great outdoors. It was the spot to lounge away the first sunny days of the season, preferably with beverage in hand.

After that, my front yard was first a fire escape and then a modest balcony, where we sat drinking "classy" wines and pretended to be worldly.

Now, I survey the front yards on our quiet street, with chalk drawings that tattoo the pavement, the toys and bikes and soccer balls left out on the lawns. Gardening tools are nestled by the front door. A watering can sits, stainless steel and gleaming, jewel-bright. Artifacts of the day's adventures and plans for the days ahead.

From our front step I nod to the neighbours, and Benjamin's own technicolour hieroglyphs decorate the pavement.

But a backyard is a whole other world. Even though it is outside, it feels more intimate, more like an extension of your home. The front yard is about show and the backyard is about substance. It is where we really live out of doors, and where others must be invited to gain entry.

This is only our second summer with our backyard, and were becoming fast friends. Last summer we were occupied with the business of having a baby, so this feels like our first opportunity to truly understand its rhythms; the way the light falls throughout the day, the cycle of plants we've inherited, and the time to revisit the haphazardly-laid plans we made a year ago.

It's got good bones, our backyard does, but is in need of a bit of a facelift. If our yard were in a movie, it would be cast as the "plain" girl who has a messy ponytail and always keeps her head down, the one that is suddenly altogether gorgeous once someone takes the time to look.

Its there. I am sure of it. The possibility of specialness, the promise of nooks and crannies for little boys to find magic, a home for a little vegetable patch, and most surely a hammock. We're almost there, our heads full of plans and with days circled on the calendar devoted to the endeavour.

All of that will come in time, and right now I am more than happy with this space outside we have all to ourselves. The lilac is in bloom, and the leaves that form our summertime roof are slowly beginning to unfurl. There is space to run and crawl and cook and dig and plant. And there is my spot, just a beeline out the back door, four strides at most, at the top of the two stairs that lead down from the deck. Sit down with a snack, and suddenly its a picnic. Stretch out, and your toes can reach the grass.

Julia Child's Homemade White Bread Our Way
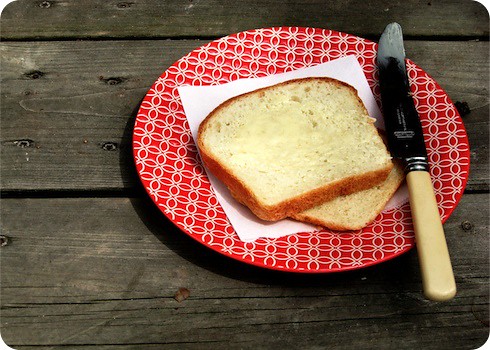
Another thing that is almost there is my attempts at making the perfect sandwich bread at home. I have been experimenting away, fiddling with yeast and rising times, with quantities of butter and sugar. Sorry about the wait, but one family can only eat so much bread at a time, and we're not a one bread sort of household.

I have realized that we like our bread plain enough not to overshadow what's put on it, but with enough personality that it is not merely a mode of transport for other ingredients. Right now, this variation on Julia Child's recipe is our usual as far as sandwich-style goes. The longer rise gives more substantial texture, and the reduced amount of yeast is preferable to our tastes. Previous columns regarding sandwich bread are here and here.

Recipe (via Slashfood)

Current changes:
• Use only 1 teaspoon of active dry yeast, allowing the dough to rise for about 2-2 1/2 hours for first rise, or until doubled in size. The second rise time will also be longer, about 90 minutes to 2 hours.
• Use 2 teaspoons of sugar instead of 1 tablespoon.
• Use 6 tablespoons of butter instead of 4 tablespoons.
• I usually dust the tops of the loaves with a bit of flour before baking, and sometimes melt 1 tablespoon of butter to brush on the loaves after the flour.

Tuesday
Mar312009

Rah-rah-sis-boom-bah

[Thursday, March 26, 2009: Due to an under-the-weather little one, I will not be able to post today . Until he's feeling better, here is a sneak peak at what we've been enjoying this week - a luscious Grapefruit Tart with a buttery, shortbread crust. Just a bit of puckery-brightness for these early spring days.

Back soon.

Tuesday, March 31, 2009: Everyone is all better, and so I am back. Thanks for all your concern and well-wishes, and for keeping a spot warm for me.]

Orange peel. Air that is sugary sweet and heavy, ripe with moisture and the scent of citrus. I shut my eyes and inhale, swallowing whole.

Its February and I am in my parents' kitchen.

For years, my Mum made marmalade; each time turning to the same book, using the same recipe for as long as I can remember. Stains and smears have turned the page translucent in places, smudging the penciled notes along the margins.

The ceremony of marmalade making took the day. The speckled charcoal pot, used only for canning, appeared from the depths of cupboards. Sterilized jars lined up like soldiers on the counter, gleaming, waiting to be of service. I have a mix of memories of the procedure; the infinite boiling, reducing, concentrating of flavours, the endless task of cutting the thin peel into even thinner strips, staining my nails in the process.

And although at the time I did not much care for marmalade, the notion of those jars is still one of my strongest culinary memories and present-day aspirations. What care was there of winter when there was such warmth in the kitchen, such delicious bounty to be enjoyed?

While the calendar may (almost) read April, it still (almost) feels like February here. At best, early March. Maybe.

The sun may be warm but the wind is not; it still breathes bitterly against our faces each morning, sending me shivering back into the warmth of the house and reaching for a scarf. Just the other day I was greeted with snow in the moments just after sunrise; it cascaded delicately, like icing sugar upon a cake rather than a true snowfall, but it was frozen nonetheless. This morning there was no snow, thank goodness, but the grass was frost-tipped and blue in the early light.

Spring is dragging her feet.

But, there is hope. There are the teeniest buds on our lilac tree; tiny, perfect little bundled fists of green, holding within their grasp the promise of warm days to come. The afternoon light has changed its character, doffing its winter garb of blue-grey hues for warmer shades of palest flax. And while I wait, as patiently as I can, for local rhubarb and asparagus and, sigh, berries to make their way to market, at least I can count on citrus to bring even more sunshine to our day.

Bold and boisterous on the tongue, citrus is rah-rah-sis-boom-bah blithe, full of cheer and high kicks. Citrus fruits are sharp and spry, marching merrily ahead as spring lags behind, with enough pep in their step to wake our palates from the sedative effect of a season's worth of comforting richness.

I was looking for a tag-along companion for a Sunday brunch invite, something that could add some brilliance to what could be a gray morning. Citrus was surely the ticket, and I wanted to journey on the path of least-resistance; some quick Saturday baking and Sunday primping, with little worry and few opportunities to be lead astray.

I wholly ignored the option of sometimes-temperamental shortcrust pastry, eyeing in its stead a forgiving shortbread crust. I passed on the idea of a persnickety curd for its filling; with its demands of patient stirring over gentle heat and its abject fear of overcooking, a curd can be such the little fusspot. Not what I was looking for in a brunch guest.

A grapefruit-modified version of a traditional Key lime filling was my choice, whisked together and briefly baked, it demanded only the slightest attention; its presence fit perfectly in the bleary-eyed pottering about of Sunday morning.

Yellow upon yellow, this tart speaks of brightness in golden tones. The floral notes of Ruby Red grapefruit are accented by twangy lemon, and tempered by creamy-sweet condensed milk. The shortbread crust is the perfect foil for the citrus, buttery against all the tang of the filling.

So thoroughly-cheered was I, I (almost) felt prepared to be patient as I wait for spring's arrival. Almost.

Grapefruit tart with shortbread crust

Ingredients for the crust
1 1/2 cups all-purpose flour
1/4 teaspoon salt
3/4 cup (1 1/2 sticks) unsalted butter, room temperature
1/2 cup confectioners' sugar
2 large egg yolks, room temperature
2-3 teaspoons heavy cream

Ingredients for the filling
4 large egg yolks
1 can sweetened condensed milk
2 teaspoons grated grapefruit zest
1 teaspoon grated lemon zest
1/2 cup freshly squeezed grapefruit juice (preferably Ruby Red)
1 1/2 tablespoons freshly squeezed lemon juice
1/8 teaspoon salt

Prepare the crust first. Whisk together the flour and salt in a medium bowl and set aside. In the bowl of a stand mixer with the paddle attachment, or in a large bowl using a hand mixer, cream together the butter and sugar on low until light and well blended.

Add the eggs yolks, one at a time, beating well after each addition. Scrape down the sides of the bowl as needed. Add the flour and mix until almost blended. Slowly add 2 teaspoons of cream, checking if the dough has come together. If it is still a bit dry, add the rest. Stop mixing as soon as there is no longer flour visible.

Turn the dough out onto a piece of plastic wrap, using the wrap to shape the dough into a flattened disk. Wrap tightly, then refrigerate for 1 hour.

After the dough has chilled, lightly flour your work surface. Roll out the dough into a 1/4-inch thick circle, about 12 inches in diameter. On a parchment-lined baking sheet, drape the dough over a 9-inch flan ring, fitting the dough gently and pressing it into the edges. Chill the dough for 10 minutes.

Using a sharp paring knife, trim the dough so that it is flush with the rim. Return the tart shell to the refrigerator for 30 minutes to firm up and chill thoroughly.

Preheat an oven to 375°F (190°C). Line the tart shell with parchment, allowing a 1-inch overhand. Fill lined shell with pie weights and bake until the pastry's edges are beginning to colour, about 15 minutes. Remove parchment and weights, using the overhang of paper to assist. Continue baking until the pastry is light golden all over, about eight minutes more. Remove from the oven and transfer to a wire rack to cool completely (still on parchment lined baking sheet).

Turn the oven down to 350°F (175°C).

In the bowl of a stand mixer with the whisk attachment, or in a medium bowl with a hand mixer or whisk, beat the yolks on medium-high speed until fluffy and pale, about 3 minutes. Add condensed milk, zests, juices and salt, and beat to combine, scraping down side of bowl as needed.

Pour the filling into the cooled prepared tart shell and bake until just set, about 10 minutes. Still on its parchment, transfer the tart to a wire rack. Cool completely, then loosely cover in clingfilm and refrigerate for at least 1 hour or up to overnight.

Allow the tart to sit at room temperature for about 10 minutes before serving; remove the flan ring and garnish with some softly-whipped cream, crème Anglaise or simply with a dusting of confectioners' sugar.

Makes one 9-inch tart, serving 12.

Notes:

• Alternatively, use the leftover egg whites to top the tart with a torched Swiss meringue.
• The tart as shown was baked in a 10-inch quiche pan with extra-deeps sides and a removable bottom. The amount of filling and pastry require a deeper capacity.

Thursday
Mar192009

All the more welcome

Some leftovers lose their allure rather quickly. Seemingly overnight, they become insufferably-dull house guests who have overstayed their welcome. In the light of day, gone is their allure, and with it, any remnants of your hospitality.

Most members of the fried food family, for example, fall into this category. They are the sort of guest with only one amusing anecdote to share. Sure, they are ever so witty and amusing for that one story, but a singular performance is all they can muster. After that, the conversation falls flat and everyone is looking at their watches, praying that nobody is in the mood to stick around after dessert is finished.

On the other hand, there are those dishes you hope will stick around long enough to become leftovers; in fact, you anticipate their arrival. Every Thanksgiving, whether it is me or another family member roasting the requisite bird, we purposely over-estimate our needs just so we will have some left over. Goodness knows, turkey sandwiches in the days following are almost more tempting than the feast the day before.

Roasted vegetables are agreeable fresh off the barbecue and paired with grilled meats for supper, but they are all the more welcome the next day when they reappear in a sandwich or are tossed with some greens for a salad. These are the sort of kitchen guests you look forward to, those which seem sublime at all times, even if their sojourn lasts more than a day or two.

Bread might be the most wonderful of leftovers, with almost endless charms. Slightly-past-its prime brioche is perfect for summer pudding, and I am altogether too happy to have a country boule hang about, drying out, just so there can be a panzanella in a few days.

Up until last evening, our inordinately-large bread box was playing host to the stragglers from our St. Patrick's Day festivities, a half-eaten round of Irish soda bread. While the loaf was far from dry, thoughts of bread pudding inspired an impromptu kitchen visit.

Eggs, milk cream and sugar blended together in a quick custard base. Cubed bread took to its bath, soaking for a long while. After a slathering of velvety raisin jam, the bread rested again, before a long, low bake in the oven. Still warm, the bread had the slightest bit of resistance left, only just yielding to the tooth.

Exactly the sort of company I was looking for.

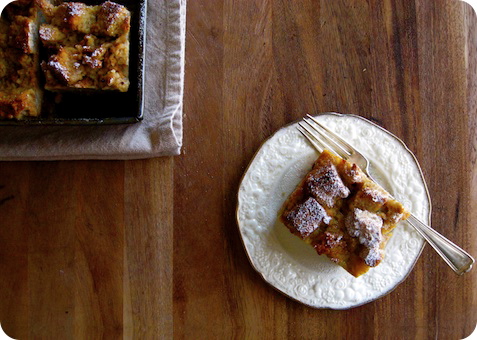
Irish soda bread pudding with raisin jam
This is a hearty, not overly-sweet rendition of bread pudding; suited as much for breakfast as it would be for dessert. The raisin jam, which is really more a purée, was included for a loved one who likes the taste of cooked raisins but not their texture. Layered in the pudding, the raisin jam becomes a dark ribbon of concentrated raisin-ness, ginger and spice. I particularly enjoyed how the crags and crevices of the bread cubes allowed for alternating pools of jam, then rivulets, so that each bite had its own character.

Ingredients for bread pudding
4 eggs, at room temperature
1/3 cup brown sugar, packed
1/2 teaspoon vanilla
1/2 teaspoon ground cinnamon
1/8 teaspoon ground nutmeg
1/8 teaspoon kosher salt
3 cups milk
1 half and half
A generous 6 cups of 3/4-inch cubed Irish Soda Bread, see note
1 recipe raisin jam

Ingredients for raisin jam
1 cup raisins
1/2 cup water
2 tablespoons orange juice
1/4 teaspoon freshly grated ginger
1/4 teaspoon cinnamon
1/8 teaspoon salt

Make the jam first; in a small saucepan over medium-high heat, combine all the jam ingredients. Bring to a boil, then reduce heat to maintain a simmer for around 10 minutes, stirring occasionally. At this point, the raisins should be soft and plumped, with a bit of moisture left in the pan. If it gets too dry and sticky, add more water, a tablespoon at a time. Working carefully, transfer the raisins to a small food processor or blender and purée until fairly smooth, again adding more water if necessary. The purée should be rather thick, but spreadable. Remove the jam to a bowl and allow to cool.

Meanwhile, lightly grease a 9-by-9-inch baking pan with butter and set aside.

In a large bowl, whisk together the eggs, brown sugar, vanilla, spices and salt. Whisk in the milk, continuing until all the ingredients are well-combined and the sugar is dissolved. Add the cubed bread, pressing down to submerge it into the milk mixture, and set aside to soak for around 30-40 minutes. By that point, almost all the liquid should be absorbed.

Preheat an oven to 350°F (175°C).

Spread half of the bread cubes in the prepared baking dish, making an even layer. Spoon the raisin jam over the cubes, spreading to cover all but a 1/4-inch border around the sides. Carefully top with remaining bread. If any liquid remains in the bowl, pour it over the pudding; soak for 10 minutes.

Set the baking dish in a larger roasting pan, and put in the preheated oven. Pour very hot water into the roasting pan, until it comes halfway up the side of the baking dish. Bake the bread pudding for about 50-60 minutes, or until a knife inserted near the centre comes out almost clean.

Serve warm or at room temperature, dusted with icing sugar or a drizzle of maple syrup.

Makes one 9-by-9-inch pan, serving 8.

Notes:

• The character of your soda bread will make all the difference here; I like a loaf that incorporates at least some whole wheat or oats, for added texture. The density of the bread will also determine how much soaking time is necessary. Be patient, and adjust timing accordingly.
• For a taller bread pudding, which is my preference, use a greased 8-by-8-inch baking pan instead. In this case, it may be that not all the liquid will fit in the pan right away. Pour as much as possible in without overflowing, let stand until absorbed and then repeat until done. Resist the urge to compress the bread too much, too soon. The cooking time will need to be longer to compensate for the additional depth.

Page 1 ... 2 3 4 5 6 ... 11 Next 5 Entries »