Instagram Instagram

Entries in chocolate (24)

Sunday
Aug172008

A cocoa'd clash of the titans


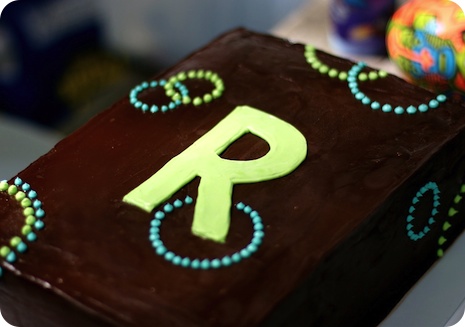
Shown here surrounded by toys at a family picnic, Martha Stewart's One Bowl Chocolate Cupcakes and Beatty's Chocolate Cake from Ina Garten were combined in a multi-layer cake. Photos courtesy Deep Media.

As anyone familiar with the recipes and columns featured on this site might assume, I am pretty much my family's unofficial baker. One could also rightly assume, seeing my penchant for chocolate, that this fondness might run in the family.

And so, with birthdays, anniversaries, graduations, family reunions and all other manner of festive events, I bake a lot. Not that I am complaining; far be it in fact.

Sometimes there is nothing I would rather do than to pull out my beloved mixer and spend the afternoon measuring, beating and baking. Nowadays I am most often aided by the efforts of my rather endearing assistant, who particularly enjoys sifting dry ingredients and feels it his birthright to lick the bowl whenever possible.

But I digress. Back to the chocolate. Since this love for all things to do with the cacao bean seems to be part of our familial DNA, chocolate cakes are often the request for our celebratory events. Every time I am asked, these words activate my June Cleaver gene; I become consumed with the desire to make the most delicious, most gorgeous, most towering creation of irresistible, indulgent cake and decadent frosting imaginable.

A few years ago I started making the One Bowl Chocolate Cupcakes from Martha Stewart's Baking Handbook to satisfy this task. They were met with resounding accolades as everyone proclaimed them to be the "best ever." I made these for picnics, frosted with chocolate buttercream and decorated with accents of Martha Stewart's signature jadeite green. Truly a one-bowl wonder, I made them in a layer cake variation for a joint birthday party and was later told tales of attendees fighting over the last slice.

Then along came Beatty. I never met her, but was introduced to her legacy by Ina Garten on the show The Barefoot Contessa. It seems that this wonderful woman, the grandmother of Ina's friend Michael the florist, made a fantastic chocolate cake. Like Martha's, hers came together with a single bowl and beater and was advertised as delicious. Who was I to argue with Ina? So the next family event rolled around, and out rolled Beatty's cake. Now this recipe was deemed supreme, and all others were said to pale in comparison.

"What about Martha's?" I asked my family.
"This is better." They replied.

The problem was, I know better than to trust my family and friends. See, I know them. They are a fickle, fickle bunch. Easily swayed by the power of chocolate, give them a slice of homemade cake and they will pretty much say whatever you ask them to. They know cake that is in front of you will always be far superior than the cake that has long been eaten.

I had to find out for myself.

It just so happened that recently I was contemplating the task of a cake for an annual family picnic. It was to celebrate a six-year-old's birthday, and when I asked for particulars I was told "chocolate, no nuts." Armed with this instruction, I decided that purity was the way to go; chocolate upon chocolate. And layers. Lots of layers. What child (or adult for that matter) doesn't catch their breath just a little at the sight of a towering slice of birthday cake?

I was perusing recipes when I realized the opportunity at hand. I could finally settle my chocolate cake conundrum - whose cake was better, Ina's or Martha's? I did the math - one single layer 9"x13" cake (or double layer 9") serves about 16 people. If I took two recipes for cakes that size, I could easily serve my 30.

Then I ran into a problem. If I did one layer of each cake, they may bake up to different textures or colours. That would not work. As anyone who knows me can tell you, I am a stickler for consistent results in baking.

But I did not want to pass up this chance to finally try these cakes side-by-side. I considered my options and came up with an unorthodox plan.

Make each recipe to the letter, or at least to the letter of the notes I have made over the years. Take one 1 1/4" ice cream scoop of each batter and bake until done in a miniature muffin pan. Take the rest of the two batters, combine them, weigh them, then divide them evenly between three 9"x13" pans for baking. I would have two pure testers to compare, and three identical layers for the picnic.

It was just crazy enough to work. And, well, require a heck of a lot of dirty bowls and two nights of staying up well past my bedtime. And yes, I am fully aware of my obsessiveness.

But it was so worth it. Battle chocolate cake has a winner - Martha*.

I wish I had taken a photograph of the miniature cupcakes, but it was later than I would like to admit and there was no way I was pulling the camera out at that hour.

Take my word for it, Martha's baked up with a beautiful, glossy-smooth crown and sprang back jauntily to the touch. Ina's was slightly more reticent to recover and flatter on top - a trait helpful in layer cakes, but for a cupcake it looked a little depressed. However, the dark, peat-like colour of each was strikingly similar when compared, as was the crumb. Both cakes boasted a texture that was well-formed, open and moist. If I was pressed to note a difference, Ina's was ever so slightly more moist and delicately-elastic to the tongue.

And now the taste. While Ina's did have a prominent cocoa flavour balanced by a subtle coffee undertone, Martha's was somehow more intense, without being overbearing. I could not put my finger on it, but there was something that gave the latter more character. I am sorry and mean no offense Beatty, but something about your cake (while exceedingly tasty) was a smidge reminiscent of a boxed cake when put up against Martha's. Truly, Ms. Stewart's was that good. It was richer, deeper, chocolateyer. I found it was every -er I could hope for.

I knew it was not a good idea to listen to family members on a chocolate high. Sometimes due diligence, along with a bunch of eggs and a box of cocoa, is the only way.

* Some commenters are surprised at Martha's win. To be frank, I was too; I love Ina's cake. Upon reflection, I wonder if Ina's was a victim to its texture; its light sponginess melts in the mouth, while Martha's edge in structure allows it to linger. In short, you simply have more of an opprtunity to taste the latter. It should be noted though, that I did alter Martha's original recipe (see below), so the victory is subject to a condition.
Epilogue:

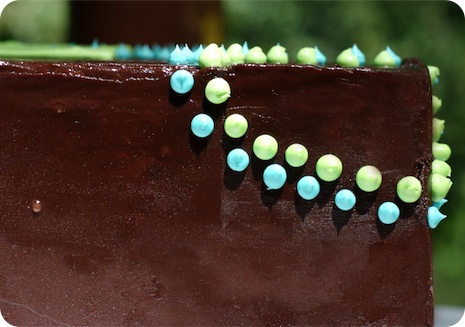
For those wondering what the layer cake was like after I combined the two recipes, it was sinfully yummy. The layers baked up exceptionally even, but their size and tenderness did make them a somewhat delicate to handle.

I am fairly sure that the number that ended up at the event was somewhere closer to 50, and the cake served the crowd handily. Everyone came back with glowing reviews. I would almost hazard to say the cake was better than Martha's cupcake, but I am scared to start down that slippery slope. Goodness knows, I can't make a behemoth like this one for every event, now can I? With results like this though, I won't say I'm not tempted.

You will note I have not included the recipe for the frosting, because that research is still ongoing. In this instance, I used a loose adaptation of a few recipes for chocolate buttercream between the layers, covered with an improvised ganache smoothed over top.

One bowl chocolate cupcakes
From Martha Stewart's Baking Handbook (Clarkson Potter, 2005).

As the recipe is subject to copyright, I have only included my notes here. However, a quick search does find it published online (not through the official site, not the one that begins with 3/4 cup unsweetened cocoa powder).

Notes:

• In lieu of milk alone, I use 1/2 cup sour cream plus 3/4 cup milk. Alternatively, I have had success swapping in some buttermilk.
• As many may remember, I am an addict when it comes to espresso and chocolate in combination; so I use about 1/4 teaspoon of espresso powder dissolved in the warm water. If espresso powder is unavailable, I recommend at least 1/2 cup of prepared coffee substituted for the same amount of water (combined with enough warm water to meet the recipe's specification).
• If using kosher salt for baking, I sometimes will stir it into the liquid ingredients instead of sifting it into the dry. This way you ensure that it is fully dissolved.

Sunday
Jul202008

A master's work; a review of Chocolate Epiphany


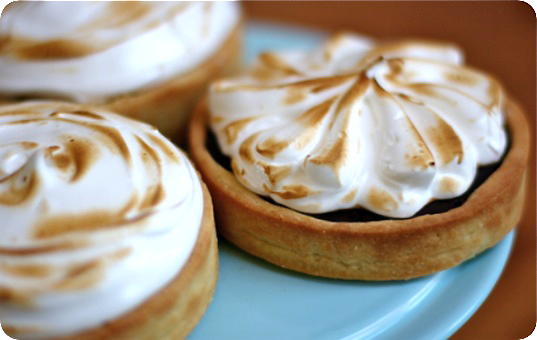
François Payard's Chocolate Meringue Tarts in miniature; photo courtesy of Deep Media.

When I was little, I took piano lessons to little success. Even though I could manage to replicate notes on the page, I never had the 'sense' for the keys that makes one feel in ownership of the music. Nonetheless, I would spend the requisite time practicing on the keyboard at home, repeating the disjointed notes over and over until I hoped I had mastered them.

It was during these practices that my father would sometimes wander into the room and take over the keys; though wholly self-taught, he had such an ear for music that he could easily reproduce my melodies in their entirety. What's more, he would infuse them with nuance and a character deeper than the notes themselves.

In that simple exercise I saw what it mean to be an artist.

I had a similar feeling of revelation when I had the opportunity to review François Payard's third book, Chocolate Epiphany (Clarkson Potter, 2008). Though a fairly-proficient home baker, I could not help but be awed by the chocolate creations featured within. From the straightforward to the fanciful to the elegant, Payard (with Anne E. McBride) presents confections as beautiful as they are delicious.

Though focused solely on chocolate, the book covers a surprising breadth of recipes. After the helpful introductory guide, breakfast and brunch dishes are offered first, followed by chapters highlighting specific dessert forms (cookies, cakes and mousses, among others). The recipes encompass both the traditional and the unexpected, with classic favourites placed alongside inventive combinations of flavours and textures. There is no prejudice regarding chocolate varieties, with white, milk and dark all given the opportunity to shine.

As to be expected with his pedigree, the acclaimed pastry chef, James Beard Award winner and owner of a collection of pâtisseries/bistros includes recipes that are somewhat intimidating at first glance. These require a good deal of patience, reasonable skill and, in many cases, specialty equipment.

For example, the American Opera Cake calls for no less than four separate component recipes and three pages of instructions. That said, the expertly-detailed steps allow for stunning results that merit the effort. Between the chocolate cake layers Payard ingeniously switches the classic coffee buttercream filling for a peanut version alternated with a decadent peanut butter ganache. If that was not enough, a dark chocolate ganache is finally poured over all. The finished cake is a masterpiece of textures and a show-stopping celebration dessert to say the least.

Equally impressive are the Chocolate Pavlovas with Chocolate Mascarpone Mousse. Here Payard innovates by reconfiguring the form from a simple flat base into a full sphere of meringue filled with liqueur-laced mousse and topped with a flourish of mascarpone cream. Again, this is a recipe that one should carefully read before attempting, but the instructions are well laid out, concise and easy to follow.

Amongst these rather grand recipes Payard sprinkles in some beatifully-simple ones. Triple Chocolate Financiers (recipe) are a perfect little treat alongside coffee, Chocolate Rice Crispies are a bit of kitchy fun, and Chocolate Blinis elevate breakfast to a whole new level.

I was particularly fond of the Chocolate Meringue Tart (pictured, above). A cocoa makeover of the lemon meringue version from his childhood, Payard creates a recipe that is easy to assemble but with outstanding results. His Sweet Tart Dough comes together quickly and is a joy to work with. It is baked until golden, then filled with a luscious dark chocolate filling and crowned with peaks of scorched Swiss Meringue. Absolutely delicious.

One caveat, I did end up with an excess of filling even though I followed the recipe to the specific weight measurement of each ingredient.

Rounding out the contents is an indispensable chapter of basics; buttercreams, Crème Anglaise, doughs, and often-used base cakes are explained here, with tips and tricks usually only learned with years of experience. For those wishing to replicate the exquisite decorations that adorn many of the desserts, there are also step-by-step directions to creations like chocolate fans, drops, sticks, and shards.

The sumptuous photographs by Rogerio Voltan are tempting to say the least; with tightly cropped images that beautifully convey the various textures and elements of the recipes. My only complaint is that I could not find photo captions for the desserts featured on the chapter cover pages. While this information is included in the general index, the omission of labels alongside the specific images might be frustrating to those who find it difficult to match the photos with the corresponding recipe.

Nonetheless, Chocolate Epiphany is decadence at its best; truly an opus of cacao bean, with a Maestro's passion and expertise leading the way.

Some recipes from the book can be found online here and here.


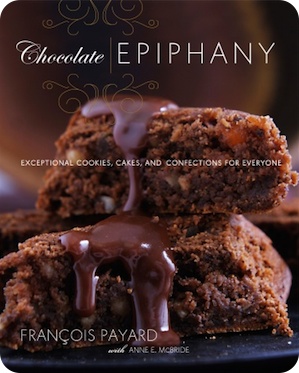
Cover image courtesy Clarkson Potter.

Monday
May052008

Martha, Martha, Martha; an addendum

You know a new cookbook is a good one when you find the excuse to bake twice in one week, just so you can try another recipe.

(As labelled in the book) Milk Chocolate cookies from Martha Stewart's Cookies. Thin and crisp at the edges but still tender at the middle, these cookies have just enough deep chocolate flavour to feel a treat but not overly-indulgent; a dangerous trait, to be sure. In my opinion the cookies I took out after about 11-12 minutes, rather than the recipe's instructed 15, were the perfect balance of chewy and crunch - but this is a matter of personal taste.

To read a full review of Martha’s latest cookbook, please see my previous post.

Tuesday
Aug142007

Dear Mr. Truant Officer*

*Please see recipe added below.

Once these, the long legged days of August saunter in, I find it impossible to focus on anything other than gallivanting about. But who can blame me? With peach festivals, Rotary-sponosed rib cookoffs, world-class food fairs, you can understand my distraction.

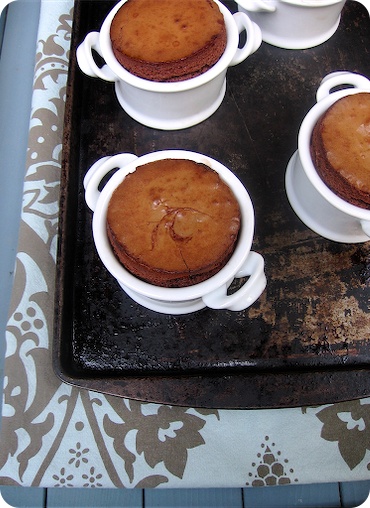
Case in point. When you find yourself making espresso-laced versions of (almost kitch) molten lava cakes, for the simple reason that it is Tuesday night and it is a gorgeously cool evening, you know that you are lost.

Though my school days are a distant memory, my thoughts have turned towards notions of holidays and diversion, of idle pastimes and fleeting pleasures. But lest you think I have abandoned all thoughts of responsibility, I shall be taking you all along with me on a little field trip to St. Jacobs later this week. We will wander through aisles upon aisles of antiques, take a gander at local artisans and gather up armfuls of gorgeous produce, baked goods and specialty meats from the farmer's market.

My apologies for my absence, but please don't turn me in.

Espresso and chocolate fondants
My variation of these recipes.

Ingredients
1/2 cup (1 stick) unsalted butter, plus more for greasing the pots
2 ounces bittersweet chocolate, chopped
3 ounces semisweet chocolate, chopped
2 eggs
1 teaspoon instant espresso powder
1/2 teaspoon vanilla extract
2/3 cup caster sugar
3 tablespoons all-purpose flour

Preheat oven to 400°F (200°C). Grease 4 x 150ml ramekins with butter (see note).

In a double boiler, or a bowl placed over a pan of just simmering water, melt the butter and chocolates together. Stir to ensure even and gentle melting of the chocolate; when just melted, remove from the heat and set aside to cool.

Meanwhile in a small bowl, whisk together the eggs, espresso, vanilla and sugar until the mixture becomes thick and slightly pale in colour. Add the cooled chocolate, whisking to blend well. Finally, stir in the flour until just combined.

Divide the batter among the prepared ramekins; bake on a baking sheet for 17-20 minutes, or until the tops are crevassed and cracked while the oozing underneath. Cool only for a moment and serve hot.

Notes:

• I use these little 150ml pots that I'm terribly fond of as the cakes will soufflé up just a bit and offer a charmingly springy top. However, you can also use a slightly larger ramekin (though I would not go larger than 250ml or 1 cup) for a denser, more deeply cracked fondant.

Thursday
May032007

Getting to know you

Seven years ago Sean gave me one of my most treasured possessions. It was my birthday, and he had found a copy of the out-of-print, rather unknown, favourite book of my childhood.

Whereas my original copy had long ago lost whole sections out of overuse, this new copy was pristine perfection; the story intact and whole again.

Flipping through the pages, my enthusiasm for a tale of little mice and their adventures to a faraway land came rushing back. With the glee of a six-year-old, I pointed out the illustrations that had inspired me the most, explained to him the nuances of each character and hugged the book like the long-lost friend it was.

What made this gift all the more special, was that Sean and I had not known each other in childhood. It was only through my mentioning the book that he realized the importance to me. Having it now was a window to that youth, an opportunity for him to know the girl I had been.

Lucky for me, we have many ‘relics’ of Sean’s early years - our son Benjamin now plays with some of the same toys and is even measured on the same growth chart against which his father stood tall. But beyond all these, one of the most meaningful of legacies are the recipes I have been given by his family.

Whether it be the cheesy pasta salad that appears at every family gathering, or the apple cake that heralds fall, or Grandma's famous (and decadent) butter tarts, each of these recipes is inextricably tied to memories from the family I now call my own. Though unshared by me, I feel a part of those reminisces with each bite, and hopefully in the future, with each time I serve them.

Munching on a bakery-bought cookie a few days ago, I came to think of the recipe for Oatmeal Date Cookies from my dear Mother-in-Law. Passed down from her mother, it was the recipe noted with the scribble “Sean’s favourite” in the margins of their church’s fundraising cookbook.

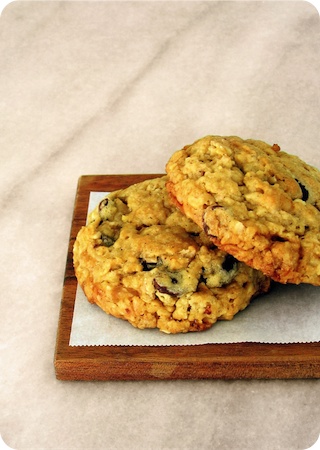
Chewy, fat and unapologetically old-fashioned, these are the stuff of cookie-jar glory. I have dressed them up a bit with shards of almond butter toffee and chocolate chips; but that was just my mood that day. These are the perfect canvas for whatever strikes your fancy - white chocolate and dried cherries, perhaps? It doesn't matter the specific flavours of your childhood, as long as you remember to visit them once in a while.

Almond toffee oatmeal cookies
My own variation, based upon a recipe by my husband's maternal grandmother. They may look like your typical oatmeal cookies, but the salted toffee adds and unexpected depth of buttery flavour. I prefer some of the toffee pieces on the smaller side, so they melt into the batter when baking.

Ingredients

For the almond butter toffee
1/3 cup plus 1 tablespoon granulated sugar
1/4 cup unsalted butter
2 tablespoons water
1/8-1/4 teaspoon salt
1/3 cup flaked almonds

For the cookies
1 cup all-purpose flour
1/2 teaspoon baking powder
1/2 teaspoon baking soda
1/4 teaspoon salt
1/2 cup butter
1/2 cup firmly-packed light brown sugar
2 tablespoons dark corn syrup, golden syrup, honey or maple syrup
1 egg
1 teaspoon pure vanilla extract
1 1/2 cups old-fashioned rolled oats
3/4 cup chocolate chips
1 batch almond butter toffee, crushed into bits

To make the almond butter toffee

Grease a half sheet pan (13"x18") or cookie sheet.

Combine all ingredients, except the almonds, in a small, heavy bottomed saucepan. Over medium heat, stir until the butter is melted. Reduce the heat to medium-low and continue to cook, stirring occasionally, until a candy thermometer reaches 300ºF (150ºC). This will take about 25-30 minutes. If you do not have a candy thermometer, carefully drip a small amount of the sugar mixture into a cup of cold water; if it has reached the right temperature it will collect into a hard ball.

Meanwhile, in a skillet over medium-high heat, spread the almonds in a single layer. Toss the nuts occasionally to prevent scorching. Once they are light toasted brown and aromatic, remove from pan and set aside.

Mix nuts into butter toffee mixture. Working quickly, spread the toffee over the prepared half sheet pan in a thin layer. It will not fill the entire pan. Set aside to cool completely.

When cooled, break the toffee into irregular bits. I find it easiest to put pieces into a large, loosely sealed food storage bag and pounding the toffee into submission with the bottom of a skillet. You should end up with about 3/4 cup of nubby gravel.

For the cookies

Preheat the oven to 350°F (175°C).

In a medium bowl, sift together the flour, baking powder, baking soda and salt. Set aside.

In the bowl of a mixer fitted with the paddle attachment, or with a hand mixer, cream together the butter, brown sugar and corn syrup until light and fluffy. Scrape down the sides of the bowl as needed. Add the egg, beating well. Mix in vanilla.

With mixer on low speed, add flour mixture and mix until just incorporated. Using a rubber spatula or wooden spoon, stir in the oatmeal, chocolate chips and crushed toffee.

Drop 2 tablespoons of dough into mounds (I use a disher that is 1 1/2” across) onto parchment or silpat lined cookie sheets. Space mounds about 2 inches apart. Bake until lightly golden around the edges, but not crisp, about 10-12 minutes.

Cool on sheets for 5 minutes; transfer to a wire rack to cool completely.

Makes 2 dozen.

Notes:
• If anyone would like Sean’s Grandmother’s original recipe for Oatmeal Date Cookies, please leave a comment to that effect; I would be happy to oblige.
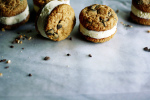
• Due to the buttery toffee, these cookies will melt and spread while baking. If you would like to reshape them, take a wide glass or bowl and swirl the slightly cooled (maybe after 10-15 seconds out of the oven) cookies in a circle. The edges will collect together neatly, as pictured.