


Monday
Feb072011
Geography
I thought I’d tell you about where I grew up. I don’t think I have before, which is a shame, as it really was a fine place to be.
I was born here in Canada, in Montréal, Québec to be specific. We moved to southern Ontario when I was a toddler, and it’s where I did almost all of my growing up. When I think of this place, I think of its geography.
On one side we had Lake Ontario. It is broad and blue, and, depending on where you stand, without end on the horizon. The escarpment, a rocky outcropping that carves a jagged, irregular zigzag across the map, is to its opposite. In between and all around were fields, orchards and vineyards, with their imposed geometry of pattern and crops on the landscape.
Then there was the river.
The Niagara River flows between Lakes Erie and Ontario, over its eponymous waterfalls and a breath-stealing gorge. Over that river, across that expanse that feels so big the air between feels solid, is a whole other world; a whole other country, in fact.
That’s the thing about living in a border-ish town. There’s the false familiarity of proximity with the simultaneous awareness of difference. The feeling of sameness although not quite there.
We share a lot with the United States; television stations travelled the airwaves without minding the division between us, same goes for radio. With Buffalo, New York a short drive away, I grew up with an adopted local pride (and accompanying expertise) for the distinguishing aspects of the classic hot chicken wing.
There were, of course, differences. And to a six-year-old, these were important ones. They had Apple Jacks and Cinnamon Toast Crunch cereals, for starters. And Jiff peanut butter. We had ketchup-flavoured potato chips and (sometimes) poured gravy on our fries.
Many of these disparities have disappeared in the years passed from my childhood and now, but we still spell colour and favourite with a “u”, call it Zed and not Zee for the last letter in the alphabet, our packet of ketchup-flavoured chips is emblazoned with both English and French, and we’ve got Butter Tarts. Nanaimo Bars, too.
For those who don’t know, butter tarts are basically miniature pecan pies without the pecans. Gooey, dark and the antithesis of subtle in its sweetness, the filling may include raisins or walnuts, but the inclusion of either is the subject of impassioned debate.
Nanaimo Bars, a bar cookie named after a city three time zones and 4,500 kilometers away in British Columbia, are more difficult to describe and, as far as I know, without compatriot in definition. In the way I learned to make them, you make a crust out of cocoa powder, butter, egg, graham crumbs, shredded coconut and chopped nuts (walnuts or almonds being the most trad). It’s baked until just firm and slightly crisp. I’ve recently found that other recipes cook the mixture on the stove top, with it then pressed into a pan and chilled to set.
Whatever way you make the crust, upon it you spread a concoction that’s often mistakenly-described as a custard filling. What it is, in actual fact, is a custard-flavoured icing - thanks to the brilliance of powdered vanilla custard powder. It sounds strange, and maybe it is one of those things you have to grow up with to understand, but frosting, rather than the smooth eggy tenderness of custard, is imperative for its grittyness. It is all about the specific feel of sugar and powdered custard creamed into butter.
You see, there’s ganache yet to be poured over the whole pan, and it is the texture of the custard icing that stands up to that of the chocolate. Their consistencies almost match, so that when bitten, the chocolate gives way to the filling without clear definition against the tooth.
Not to fear, the stick-to-your teeth quality of those two components is cleanly cleared by the coarse crust below. Really, they thought of everything.
It has been a long while since I’ve had a Nanaimo Bar; they went through a popularity boost in the mid-90s right when everyone was watching Friends and drinking lattes at coffee shops. Around then, you’d find Nanaimo Bars on the counters at said coffee shops, with radical frosting flavours like Irish cream, cappuccino and mocha.
But then along came Justin. Justin Schwartz, if you don’t know already, a singularly-swell individual who shares my affection for Alice Medrich’s recent book, Chewy Gooey Crispy Crunchy Melt-in-Your-Mouth Cookies. He’s been baking from it, and we’ve been chatting about it, and we got on the subject of the No-No Nanaimo Bars found, fittingly, in the Gooey chapter.
He’d not heard of Nanaimo Bars, and I of course had but was curious about the cheesecake-ish filling Medrich offers in lieu of my trashy-but-beloved custard powder. He made a pan and deemed them a revelation, which was just about all the encouragement I needed to do the same.
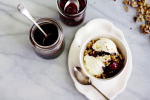
Justin is right, these were intensely good. I’ll add the asterisk that they're especially so straight out of the freezer - they won’t freeze solid, and so end up with a good share of the charms of an ice cream sandwich.
But, I will say, with allegiance and fidelity held firm, and as both Justin and Medrich herself note, these are not Nanaimo Bars. The cream cheese adds a new dimension, a refined edge of sharp dairy, that is a departure from the original. Dare I say, the dowdy bar is elevated to a place verging on elegant.
On one side we had Lake Ontario. It is broad and blue, and, depending on where you stand, without end on the horizon. The escarpment, a rocky outcropping that carves a jagged, irregular zigzag across the map, is to its opposite. In between and all around were fields, orchards and vineyards, with their imposed geometry of pattern and crops on the landscape.
Then there was the river.
The Niagara River flows between Lakes Erie and Ontario, over its eponymous waterfalls and a breath-stealing gorge. Over that river, across that expanse that feels so big the air between feels solid, is a whole other world; a whole other country, in fact.
That’s the thing about living in a border-ish town. There’s the false familiarity of proximity with the simultaneous awareness of difference. The feeling of sameness although not quite there.
We share a lot with the United States; television stations travelled the airwaves without minding the division between us, same goes for radio. With Buffalo, New York a short drive away, I grew up with an adopted local pride (and accompanying expertise) for the distinguishing aspects of the classic hot chicken wing.
There were, of course, differences. And to a six-year-old, these were important ones. They had Apple Jacks and Cinnamon Toast Crunch cereals, for starters. And Jiff peanut butter. We had ketchup-flavoured potato chips and (sometimes) poured gravy on our fries.
Many of these disparities have disappeared in the years passed from my childhood and now, but we still spell colour and favourite with a “u”, call it Zed and not Zee for the last letter in the alphabet, our packet of ketchup-flavoured chips is emblazoned with both English and French, and we’ve got Butter Tarts. Nanaimo Bars, too.
For those who don’t know, butter tarts are basically miniature pecan pies without the pecans. Gooey, dark and the antithesis of subtle in its sweetness, the filling may include raisins or walnuts, but the inclusion of either is the subject of impassioned debate.
Nanaimo Bars, a bar cookie named after a city three time zones and 4,500 kilometers away in British Columbia, are more difficult to describe and, as far as I know, without compatriot in definition. In the way I learned to make them, you make a crust out of cocoa powder, butter, egg, graham crumbs, shredded coconut and chopped nuts (walnuts or almonds being the most trad). It’s baked until just firm and slightly crisp. I’ve recently found that other recipes cook the mixture on the stove top, with it then pressed into a pan and chilled to set.
Whatever way you make the crust, upon it you spread a concoction that’s often mistakenly-described as a custard filling. What it is, in actual fact, is a custard-flavoured icing - thanks to the brilliance of powdered vanilla custard powder. It sounds strange, and maybe it is one of those things you have to grow up with to understand, but frosting, rather than the smooth eggy tenderness of custard, is imperative for its grittyness. It is all about the specific feel of sugar and powdered custard creamed into butter.
You see, there’s ganache yet to be poured over the whole pan, and it is the texture of the custard icing that stands up to that of the chocolate. Their consistencies almost match, so that when bitten, the chocolate gives way to the filling without clear definition against the tooth.
Not to fear, the stick-to-your teeth quality of those two components is cleanly cleared by the coarse crust below. Really, they thought of everything.
It has been a long while since I’ve had a Nanaimo Bar; they went through a popularity boost in the mid-90s right when everyone was watching Friends and drinking lattes at coffee shops. Around then, you’d find Nanaimo Bars on the counters at said coffee shops, with radical frosting flavours like Irish cream, cappuccino and mocha.
But then along came Justin. Justin Schwartz, if you don’t know already, a singularly-swell individual who shares my affection for Alice Medrich’s recent book, Chewy Gooey Crispy Crunchy Melt-in-Your-Mouth Cookies. He’s been baking from it, and we’ve been chatting about it, and we got on the subject of the No-No Nanaimo Bars found, fittingly, in the Gooey chapter.
He’d not heard of Nanaimo Bars, and I of course had but was curious about the cheesecake-ish filling Medrich offers in lieu of my trashy-but-beloved custard powder. He made a pan and deemed them a revelation, which was just about all the encouragement I needed to do the same.
Justin is right, these were intensely good. I’ll add the asterisk that they're especially so straight out of the freezer - they won’t freeze solid, and so end up with a good share of the charms of an ice cream sandwich.
But, I will say, with allegiance and fidelity held firm, and as both Justin and Medrich herself note, these are not Nanaimo Bars. The cream cheese adds a new dimension, a refined edge of sharp dairy, that is a departure from the original. Dare I say, the dowdy bar is elevated to a place verging on elegant.
While something special in its own right, and with great respect to all those involved, I’ll hold tight to the false-yellow stripe of frosting between my chocolate and crust. I've got a predisposed allegiance to uphold.
Custard powder in our cookies might be a Canadian thing. As far as traditions go, I'll stand on guard for thee.
Custard powder in our cookies might be a Canadian thing. As far as traditions go, I'll stand on guard for thee.
*******
The latest issue of UPPERCASE magazine is out! Here's a preview of what you'll find in the Sweet column for winter; we're extolling the virtues of the small and making mini doughnuts.
There's also been some exciting news that has had me grinning for days. The first annual Canadian Food Blogger Awards were announced last week, and was wonderful to see so many friends on the list of nominees and winners! The judges saw fit to include me on that list, nominated for photography, and winning in the categories of writing and recipes. It is an honour and my gratitude goes out to all those involved.
I feel a wee bit of stage fright on the mention of this one - a week ago I was on CBC Radio One's Metro Morning talking food and blogs. If you'd like to take a listen (be kind!) the podcast can be found here, with our segment beginning at around the 13:30 mark, and I first speak about a minute later.
It's been a good week. I hope yours has been too. Thanks for sharing all of this with me.
*******
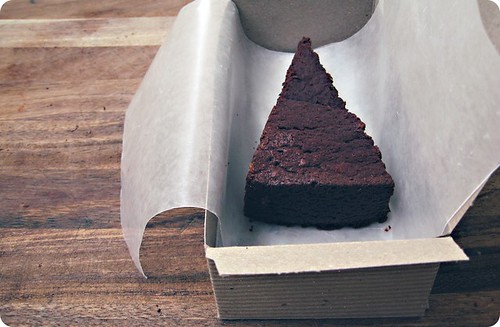
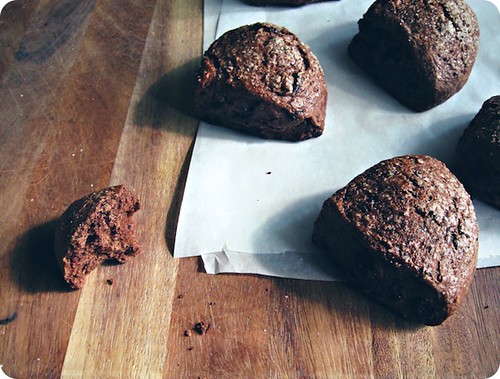
Maya's No-No Nanaimo Bars
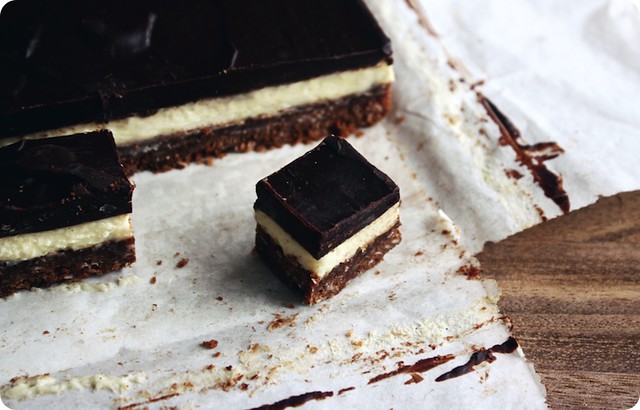
Named after the city in British Columbia, the traditional Nanaimo bar is a no-bake layered affair with a crumb crust and layers of sweet vanilla filling crowned with chocolate. These here — with a coconut pecan crust, vanilla cream cheese filling, and dark chocolate ganache — are for people who like the idea of the Nanaimo bar but wish it were different: less sweet, more grown-up, a bit modern. Oh, and these are baked. Thus, no claims to authenticity…only a very good bar created by a very good friend, Portland food maven Maya Klein.
Excerpted from Chewy Gooey Crispy Crunchy Melt-in-Your-Mouth Cookies by Alice Medrich (Artisan Books, 2010).
Ingredients
1 1/2 cups (5 ounces) chocolate cookie crumbs (from 9 chocolate graham crackers)
1/2 cup (1.5 ounces) unsweetened dried shredded coconut
1/2 cup (2 ounces) finely chopped pecans
8 tablespoons (1 stick) unsalted butter, melted
1/2 cup plus 2 tablespoons (4.375 ounces) granulated sugar
8 ounces cream cheese, at room temperature
2 tablespoons (0.875 ounce) packed brown sugar
1/2 teaspoon pure vanilla extract
1 large egg
1/2 cup heavy cream
7 ounces semisweet or bittersweet chocolate with 55% to 60% cacao
Equipment
A 9-inch square metal baking pan, the bottom and all 4 sides lined with foil
Preheat the oven to 350°F.
Mix the crumbs, coconut, pecans, butter, and 1/4 cup of the granulated sugar and pat it very firmly into the lined pan. Bake the crust for 10 to 12 minutes, or until it looks slightly darker at the edges and smells toasted.
While the crust is baking, mix the filling. In a large bowl, beat the softened cream cheese, brown sugar, and 1/4 cup of the remaining granulated sugar until smooth. Beat in the vanilla and then the egg. When the crust is baked, dollop the filling onto the hot crust and spread gently with the back of a spoon. Bake the bars until the edges are slightly puffed, about 10 minutes. Cool on a rack for 30 minutes. Chill for at least 2 hours.
Dissolve the remaining 2 tablespoons granulated sugar in the cream. Bring 1/2 inch water to a simmer in a medium skillet. Coarsely chop the chocolate and combine with the cream in a medium metal bowl. Place the bowl directly in the skillet of hot water and turn off the heat. Let rest for 5 minutes and whisk until smooth. Set aside until needed.
Pour the warm ganache onto the bars, spread, and chill for at least 30 minutes before serving. Lift the bars out of the pan by using the edges of the foil liner. Cut into 16 or 25 squares, wiping the knife between cuts. May be stored in an airtight container in the refrigerator for 3 to 4 days.
Makes 16 large (2 1/4—inch) bars or 25 smaller bars.
tagged  cheesecake, chocolate, nanaimo bar in baking, cookie
baking, cookie