Instagram Instagram

Entries in baking (53)

Thursday
Dec222005

Comfort comes in small packages

Recently at Seven Spoons:
Tara speaks from the depths of the couch, towers of magazines and cookbooks obscure her from view. Dear S is otherwise occupied with Ms. Billie, the feline mistress of the house, who is making quick work of the deconstruction of a bag of gift bows.

Tara: I’m torn. Florentines or tuiles? Both look lovely and would be perfect to package up for friends.
S: Uh huh, whatever you want, sweetie.
Tara: (opening another book, sending others flying) Take a look at these stunning cookies Martha’s made. Gingerbread snowflakes, piped with royal icing then dusted with sanding sugar. They sparkle so prettily - and you know I’m a sucker for anything with sparkles. I could do those, then some I saw in Gourmet ... I just need to find my copy ... (begins searching)
S: Do any of our friends like gingerbread? How about making the cookies from last year?
Tara: But that is boring.
S: But they were yummy. And I liked them.
Tara stops looking.

How can one not get excited to try new things come Holiday season? Bombarded with delectable images upon every magazine rack, bookshelf and television show, the season smacks of promise - there is always a new cookie to try, another way to roast a turkey, and this year’s penultimate side dish.

However, at least with my family, rarely do these new fangled recipes garner much praise. True they are well-received, but it is not often are they requested the year following. Not because they are not truly tasty, but because they are just not the tradition.

Take for example my father’s turkey. A few years ago he gallantly deboned an entire bird at our request, stuffed it with a savoury filling and then rolled into roulade - dark meat cradling the white meat inside. The turkey was perfect, moist throughout and utterly impressive.

Though it was, by far, the best bird I’ve ever eaten (and by my Mother’s command has been the only way we have celebrated the holidays for the last five seasons), there are still dissenters among the family. Since the turkey, no matter how beautifully tied, no longer resembles the classic image of a proper bronzed beast it is somehow considered inferior. My ever diplomatic Dad now roasts separate pieces of turkey to appease those souls.

It seems certain dishes are so firmly rooted in our sense of the season that we cannot be so foolhardy as to alter them. As we prepare the meal, going through the motions of making the brussels sprouts, stirring the gravy or getting out the same china we use every year - there is something inherent in these movements, in their ritual and rhythm that reminds us of years past and of memories shared. It is simply not Christmas without these tastes and smells and textures.

While I am all for innovation, I choose to spend this time looking forward and behind; taking note of now only where I am going but where I have been. There is comfort in the known, there is affection in tradition and there is pride in all that has stood up to the tests of time. Sometimes all that is needed are the tastes of home to assure us that there is still some right in the world.

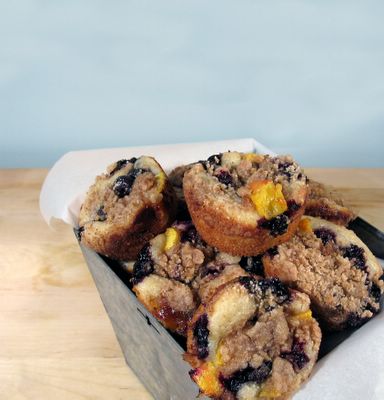
These jam thumbprints are ridiculously easy and immediately invoke a sense of nostalgia, for a time we may or may not have known. Buttery shortbread, crowned with bronzed bits of coconut and gushing with a jam filling, you cannot get more classic than these.

Jam Thumbprints
Recipe published on Food TV.com courtesy of Ina Garten. Originally published in Barefoot Contessa Family Style. This recipe produces a fabulously rich shortbread base; experiment with different shapes and fillings to suit your tastes. I used Blackberry jam for my version, and upped the salt to 1/3 teaspoon.

Sunday
Nov272005

'Tis the season for good intentions

We all do it. There is really no point in attempting denial. Pretty much everyone is guilty as charged.

I challenge anyone to pretend that they have not, at some time or another, shirked a bit of Holiday responsibility. Nothing serious I’m sure, but maybe it was a case of promising to bring a gift for a Secret Santa (less than $25, please), and in your last minute haste you spent a whopping $27.99 at the store on the way.

Or maybe you went so far as to reach back into the closet, pull out that untouched gift Aunt Meg and Uncle Stan gave you last year, snipned off the tag and presented it as your own contribution to the festivities. Regifting never hurt anyone, has it?

Or maybe you had promised to bring a home baked treat along for the annual neighbourhood open house, and somewhere in the purchasing, packing and pandemonium of pre-holiday prep, it completely slipped your mind. So you’re faced with a dilemma - head to the party empty handed or stop over at a local bakery on the way and hope nobody notices the price tag on the box.

I was in a similar predicament this morning. I had said, weeks ago, that I would be thrilled to participate in a cookie swap. I could already imagine the smell of baking butter and sugar wafting through the house; I envisioned cookie perfection, rows upon rows of gorgeous treats all waiting to be enjoyed. I poured over recipe books and magazines, scoured baking supply stores for sanding sugar and dried egg whites.

And then I got distracted. I’m not sure by what exactly, all I know is that it was suddenly the morning of the 27th, and my cookie jar had nary a crumb. Old Mother Hubbard has my sympathies.

Not willing to give up so easily (and with the bakery not opening for another three hours), I looked to my frequent saviour - the freezer. Armed with the last sheet of puff pastry, I improvised a holiday variation on an old classic, palmiers. Flaky and crisp, and glazed with a combination of reduced jam and cinnamon sugar, these cookies belie how easy they are to make. A quick roll and 12 minutes in the oven later, you are left with a tray worthy of any cookie-swap.

Happy holidays, indeed.

Holiday palmiers

Ingredients
1/2 cup strawberry jam
1/2 teaspoon freshly squeezed lemon juice (or more, if desired)
1 inch piece of lemon zest (optional)
1 cup sugar
1/4 teaspoon salt
1/8 teaspoon cinnamon (or more, if desired)
1 sheet puff pastry, defrosted as per package instructions

Preheat oven to 450º F (230º C). Line two baking sheets with parchment paper.

In a small saucepan over medium-low heat, combine the jam, lemon juice and lemon zest (if using). Heat until the jam is melted but before it reaches a full boil. Remove from the heat and allow to cool for about 2 minutes. Using a small spoon, push the jam through a fine-meshed sieve, discarding any seeds and the lemon zest. I advise some care here, as the jam will still be rather warmå. Set aside.

In a small bowl, combine the sugar, cinnamon and salt. Spread one half of the mixture over your work surface and lay the puff pastry in the middle. Sprinkle the remaining sugar on top, and begin rolling. Turn and flip the pastry frequently, pushing the cinnamon sugar into the pastry - you want an even coating. Roll until you have a 13” by 13” square.

With a small offset spatula or butter knife and working quickly , spread the jam over the puff pastry. The jam should be in a thin layer, reaching all the way to the edges of the dough.

Fold the side of the dough halfway to the centre. Fold again, so that the two folded sides now meet in the centre. Fold one half over the other as though you are closing a book and the sides are now stacked on top of each other. Place pastry log on one of the prepared baking sheets and chill for 10 minutes in the freezer.

Remove from the freezer and slice the log into 3/4 inch slices. Place slices, cut side up back onto baking sheets and chill for an additional 5 minutes.

Bake cookies for approximately 6 minutes until the filling is bubbling and glazed and the pastry is starting to turn golden. Flip the cookies with a spatula and bake for additional 5 minutes, until caramelised and puffed. Wait a minute or so, then transfer to a baking rack to cool.

Makes about 24 cookies.

Notes:
• You can use whatever variety of jam or jelly you would like for this recipe. Reducing a clear juice (for example, cranberry) would also make a suitable filling. The jam may be omitted all together, and a coloured sanding sugar added instead for a colourful spiral design.
• The palmiers are quite delicate when they come out of the oven. For flipping and transferring to a wire rack, always use a spatula larger than the cookie to maintain its shape. A light spray of cooking oil on the spatula may also assist in transferring.
• The cut palmiers can be individually frozen on a cookie sheet, then transferred to a plastic freezer bag for storage. They should keep for approximately 2 weeks and do not need to be defrosted before baking. Cooking time may need adjustment, though.

Thursday
Sep292005

Celebrating the start of something good

As I was discussing with a friend recently, fall has a very specific personality to it. While I love summer for all its brightness and enthusiasm, this time of year seems bring along a sense of hospitality. The market is still filled with colour, albeit from a kaleidoscope of rainbow hues to a wash of sunset shades. Now is the time to start braising meats and revisiting classic cold-weather comfort food. It is this idea of hearth and home, of generosity and bounty, that truly makes autumn my favourite season.

It was with this thought in mind that I started thinking about what to do with the apples I had from Schouwenaar Orchards and Vineyards. It was the weekend after the official start to fall, and I was looking for something that was homey and comforting. As I padded through the house in my slippers and robe, my gaze fell across the most recent edition of Everyday Food Magazine. Curled up to our breakfast counter, perched on a stool and with hands wrapped firmly around a warm mug, I flipped through the pages until I came upon an in-depth article on apples — with recipes both savoury and sweet, including one for an applesauce cake.

Remembering a favourite recipe for homemade applesauce using apple cider, I switched my mug for a peeler and started to work. Using a mix of Redcort, McIntosh and Galas, I happily worked away, and soon the kitchen was filled with the smells of mulled spices and the cooking fruit. What a perfect way to start a Saturday.

Once it had cooled I was left with a slightly tart, but sweetly balanced, sauce. With this success boosting my confidence, I turned to the cake recipe. As I’ve mentioned before, I'm not one to leave well enough alone — so I gave into my need to fiddle and started scribbling notes.

I had just received the thoughtful gift of miniature tube pans from my mother, so they had to be used, no doubt about it. The magazine called for light brown sugar only, but instead I included a bit of Demerara sugar, wanting the depth of almost burnt sweetness it brings. I also omitted the cardamom, as my cider applesauce was highly spiced. In one batch, I switched out the honey for maple syrup, for no other reason that I thought the spicy caramel taste would bring another note to compliment the apples.

Apple cider applesauce
Well-flavoured and slightly tangy, this is a great simple applesauce to use alone or in cooking. It has more character than store bought varieties, and comes together quite quickly. As an added bonus, your kitchen will smell heavenly as it cooks. You can use a mulled cider for this recipe, but may want to omit the cinnamon called for.

3 pounds apples, peeled, cored and cut into ½” slices (or thereabouts)
1 cinnamon stick or ½ teaspoon ground cinnamon
1 cup apple cider
2 teaspoons freshly squeezed lemon juice
Honey (optional)

In a large saucepan, combine apples, cinnamon and cider and bring to a boil. Cover and reduce heat, let simmer for 40 minutes, stirring occasionally. If the sauce looks too dry at any time, add a few tablespoons of water.

When apples are tender, remove from heat and discard cinnamon stick (if using). Stir in lemon juice, and check for sweetness. If needed, add honey to taste, to balance flavours.

Makes approximately 4 cups.

Notes
• Sugar can be used instead of the honey, but should then be added before the apples are fully cooled so that it can dissolve. I find honey a much more mellow sweet, and enjoy the resiny depth it adds.

Applesauce Cake
Inspired by the recipe published in Everyday Food.

Non-stick cooking spray
3 cups all-purpose flour (spooned and levelled)
2 teaspoons baking soda
1 teaspoon salt
1 ½ teaspoons ground cinnamon (you may omit this if you used a heavily-mulled cider in the applesauce)
1 cup unsalted butter, softened
1 ½ cups packed light brown sugar
½ cup Demerara sugar
¼ cup maple syrup or honey
2 large eggs
2 cups apple cider applesauce (or store-bought)

Icing/confectioner’s sugar (optional)

Preheat oven to 175° C (350°F).

Generously coat twelve 1 cup capacity miniature tube pans (usually in available in sheets of six), or a 10 inch tube pan.

In a large bowl, sift together flour, baking soda, salt and cinnamon.

In the bowl of an electric mixer (or using a handheld), beat together butter, brown sugars and maple syrup/honey until light and fluffy. Add eggs, one at a time, beating until well combined. The mixture should be pale and airy. With mixer on low, gradually add spoonfuls of the flour mixture, mixing until just combined. Beat in applesauce.

Spoon batter into prepared pans, smoothing the tops. Bake until a toothpick or cake tester comes out mostly clean (slightly wet) when inserted in the middle of the cake, 12-18 minutes with the miniature pans, or 50-60 using a traditional tube pan. Be sure not to over bake.

Cool in pan on a wire rack for 10 minutes. Invert onto a cutting board or baking sheet, and then again onto rack, top side up. Allow to cool completely. Serve either top or bottom side up (I liked the bottoms), with a light dusting of icing sugar.

Notes:
• Can be served alone, or with a scoop of cinnamon ice cream or a dollop of maple whipped cream.
• This cake keeps well, wrapped in the fridge. The flavours will mellow and blend.
• This batter is also good when baked in muffin tins - served with a bit of sweet butter, they make a lovely snack or breakfast.

Tuesday
Sep202005

A friend for dinner, Nigella Bites

This is my third instalment of my series in exploring my cookbooks, this time featuring Nigella Bites by Nigella Lawson.

I find that different books respond to different moods. When I want to know the minutiae of proper hollandaise technique, I know that there is nowhere to turn but a dog-eared copy of Larousse Gastronomique. A desire for “classic American cooking” is easily sated by flipping though one of the many books by Marion Cunningham. In the mood for adventure? Madhur Jaffrey’s soothing tone can lead even the novice home cook through the complex world of spices.

But there is one author I turn to most often when I’m looking for companionship - Nigella Lawson. One known for her conversational prose rather than complex (or always accurate) preparations, her books bring pure comfort; it is rainy day reading at its best. She doesn't take herself to seriously, with recipes ranging from classic to kitch. Charming and engaging, her writing is like having a chat with another food-loving friend. Details are scattered sometimes, and the stories can be rambling, but it really is all about the food.

I find her books to be inspirational, not in the sense of something to aspire towards, but rather a style of cooking that is closely related to my own everyday routine yet full of new ideas. It is accessible and simple, but still with a world-travelled palate and with an evident fondness for the social aspect of preparing and sharing food.

I will admit, I rarely follow her recipes to the letter. I usually try to make them as written the first time, but after that I usually tweak and fiddle to suit my own tastes. The fact that Lawson includes space for notes in her books speaks to me of her desire for the reader to make each recipe personal - she does not aspire to be the definitive expert on a dish, but rather seems content in introducing you to a method or an ingredient.

Such was the case with this gorgeous Chocolate Cloud Cake. Featured in the book, Nigella Bites, it was such a success I ended up making three in the same amount of days. True, no two cakes were identical (I also took ideas from recipes from Williams-Sonoma and Ina Garten), but hers was the original inspiration — and really, isn’t that saying something? Densely fudgy with a crackling, brownie-like top, this cake is deceptively simple to make, with results far greater than the effort involved.

Chocolate Cloud Cake
Also available online (including US measurements) at Nigella.com.

On days when I want the warmth of the hearth rather than the hurly burly of the city streets I stay in and read cookery books, and this recipe comes from just the sort of book that gives most succour, Classic Home Desserts by Richard Sax.

The cake itself (which was the pudding I made for last New Year's Eve dinner) is as richly and rewardingly sustaining: a melting, dark, flourless, chocolate base, the sort that sinks damply on cooling; the fallen centre then cloudily filled with softly whipped cream and sprinkled with cocoa powder. As Richard Sax says 'intensity, then relief, in each bite'.

For the cake
250g (9 ounces) dark chocolate, minimum 70% cocoa solids
125g unsalted butter, softened
6 eggs: 2 whole, 4 separated
175g caster sugar
2 tablespoons Cointreau (optional)
Grated zest of 1 orange (optional)
23cm (9 inch) springform cake tin

For the cream topping:
500ml double cream
1 teaspoon vanilla extract
1 tablespoon Cointreau (optional)
Half teaspoon unsweetened cocoa powder for sprinkling

Preheat the oven to 180ºC/gas mark 4.

Line the bottom of the cake tin with baking parchment.

Melt the chocolate either in a double boiler or a microwave, and then let the butter melt in the warm chocolate.

Beat the 2 whole eggs and 4 egg yolks with 75g of the caster sugar, then gently add the chocolate mixture, the Cointreau and orange zest.

In another bowl, whisk the 4 egg whites until foamy, then gradually add the 100g of sugar and whisk until the whites are holding their shape but not too stiff. Lighten the chocolate mixture with a dollop of egg whites, and then fold in the rest of the whites. Pour into the prepared tin and bake for 35-40 minutes or until the cake is risen and cracked and the centre is no longer wobbly. Cool the cake in its tin on a wire rack; the middle will sink as it cools.

When you are ready to eat, place the still tin-bound cake on a cake stand or plate for serving and carefully remove the cake from its tin. Don't worry about cracks or rough edges: it's the crater look we're going for here. Whip the cream until it's soft and then add the vanilla and Cointreau and continue whisking until the cream is firm but not stiff. Fill the crater of the cake with the whipped cream, easing it out gently towards the edges of the cake, and dust the top lightly with cocoa powder pushed through a tea-strainer.

Serves 8-12

Notes:
• You can make this into an Easter Nest Cake by folding 200g melted chocolate into the cream topping and dotting with the sugar-coated eggs instead of the cocoa. Leave the Cointreau out of both the cake and the cream. (NL)
• When I made this cake, I took some license and added 2 teaspoons of instant espresso powder to the egg yolk/chocolate mixture. I also used a mix of bittersweet and semisweet chocolates, for added depth.
• I ran out of parchment paper, and had fine success using a non-stick pan that I buttered and dusted with cocoa powder.
• Miniature versions of this cake are adorable, using six 4-inch springform pans. Adjust cooking times accordingly.

Saturday
Aug062005

On insipired collaboration

I will be continuing my cookbook exploration, as promised. Stay tuned.

I am, as you may have suspected, one of the many food-obsessed.

While eating breakfast, I’ll be planning my lunch and preparing a mental shopping list for dinner. When we go out, I’m constanly looking in market stalls, restaurant menus and other people’s grocery carts for inspiration. When enjoying a meal, I’m critquing the bite in my mouth, keeping an eye on the presentation, and rarely does my date survive without at least one bite stolen from his plate.

When faced with a dish, I automatically compare it to the times I have had it before, considering what I like and would improve in this incarnation, and looking for ways in which I can create my own version. It’s a compulsion, and I relish every minute of it.

I realize that the food-obsessed is not a rare breed, but we are a passionate, inquisitive and enthusiastic bunch. Not a terrible combination, I’d say.

Most recently, I became fixated on peaches. The hot hazy days of late July were upon us and, in my opinion, there is nothing more equatable to summer than the honeyed sweetness of a ripe peach. One bite into the yeilding flesh, with juices flowing down your chin, and you’re tasting all of the season.

Living in a prime stone and soft fruit region, my anticipation grew, and I began culling recipe books and websites for peach recipes, finally stumbling upon a streusel cake from Williams and Sonoma.

But oh, one recipe would be too simple. Still on my mission for the perfect recipe, I clicked over to the charming Delicious Delicious and was interested in Caryn’s blueberry streusel muffins. What if I took the W&S peach recipe and converted it to muffins or mini-cakes instead?

I have no idea where the sour cream came in. I swear, I was all set on my recipe, and out of nowhere came the thought of the tangy density of a good sour cream crumb cake entered my busy little brain. And so, I was lost. The third recipe hunt began. Donna Hay’s Modern Classics: Book 2 proved my saviour, with her sublimely simple muffin base recipe (my usual standby).

So I was set. I would combine the struesel from Williams Sonoma, the form from Caryn, the base from Donna Hay (slightly altered) and I would have my peach perfection.

Then my dear father offered me a pint of gorgeously bursting blueberries. Remembering the colour combination of black and peach from Nigella’s fruit bake with yoghurt (blackberries and peaches), I couldn’t resist his offer. This was collaboration at its best, and the result could not have been more rewarding.

Blueberry peach sour cream crumb cake
With thanks to the many contributors.

For the topping:
3/4 cup all-purpose flour
1/3 cup firmly packed light brown sugar
1/4 cup granulated sugar
1 teaspoon ground cinnamon
6 tablespoons (3/4 stick) cold unsalted butter, cut into small pieces

For the cake:
2 cups plain (all purpose) flour
2 teaspoons baking powder
1 teaspoon salt
3/4 cup sugar
1 cup sour cream
2 eggs
1 teaspoon vanilla extract
1/3 cup vegetable oil

1 cup blueberries
2 medium sized peaches, peeled, pitted and cubed into medium chunks

Preheat oven to 350°F (175°C). Butter and flour a 9 inch round springform pan (see Note).

To prepare the streusel, stir together the flour, brown and granulated sugars and cinnamon in a bowl. Using a pastry blender, two knives or your fingers, cut or rub the butter until coarse crumbs form. Set aside – if working in a warm kitchen, refrigerate until needed.

For the cake, sift together flour, baking powder and salt in a bowl. Stir in sugar. In a separate bowl, whisk together sour cream, eggs, vanilla and oil, until smooth.

Stir the sour cream/egg mixture through the dry ingredients. Be careful not to overwork the batter – mix until just combined.

In a small bowl, combine the blueberries and peaches.

Pour batter into prepared springform pan and spread evenly to fill the base (the batter will look like it is too little, but it will expand while baking). Sprinkle the mixed fruit over the batter and evenly top with the streusel.

Bake until lightly golden brown and a cake tester or toothpick inserted in the centre comes out clean, about 35 minutes. Transfer the pan to a wire rack to cool for 20 minutes. Remove the sides of the springform pan. Can be served warm or at room temperature.

Notes :
• As pictured, this recipe can also be made in a 12 x 1/2 cup capacity non-stick muffin pan. When spooning in the batter, fill until about two-thirds full. Reduce the cooking time to approximately 12 minutes. In this preparation, you will have extra streusel topping, which can be frozen for a later use.
• To peel peaches, simply bring a two-thirds filled saucepan of water to boil. Using a small knife, cut a small, shallow “X” into the bloom end of each peach and immerse the peach into the boiling water for 30 seconds. Lift out with a slotted spoon and transfer to an ice bath until cool (you can skip this step and allow them to cool on a board, but I find the ice bath expedites the process). Once cooled, the skins should peel off easily, using either your fingers or the knife.