Instagram Instagram

Entries in vegetarian (18)

Saturday
Aug292009

Bespoke the quick arrival

I know that I am a bit early for our usual Thursday chat, but I made this tart last night and liked it so much that I couldn't wait five whole days to tell you about it.

As with so many happy accidents, I came about this success without paying much attention. It is the improvised partnership of recipes from others I admire, brought together by the downright-unglamorous need to clean out the fridge on Friday night before Saturday's trip to the market.

Heidi's Lasagna Tart was an instant favourite in our kitchen, first made within days of her kindly sharing the recipe. The barely-cooked sauce and the raw zucchini keep the flavour remarkably fresh and light even after baking, while the ricotta layer brings creamy relief to all that acidity. I have used the olive oil crust she provided, as well as the Parmesan variation she suggests. Both to great acclaim.

I had never made Rachel's Tomato and Zucchini Tart before, but is a recipe that piqued my interest. Instead of sauce hers has tomato slices, roasted briefly along with the summer squash to concentrate and sweeten their flavours. And her cobblestoned topping of fresh mozzarella is far from a bad thing.

Since yesterday brought rain and temperatures that bespoke the quick arrival of fall, I chose to take elements from each. I wanted a dish that brought some comfort, but didn't ignore that fact that it is still August. What follows is what I think I did, written without formality and with only my best estimates of quantities and timing.

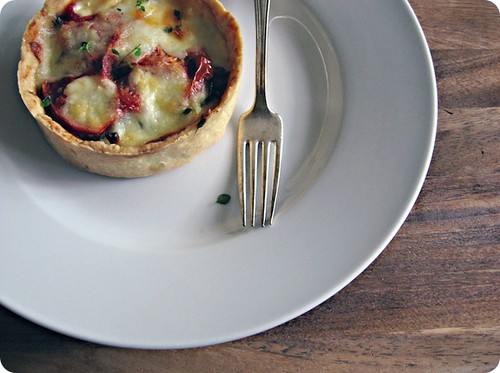
I had not intended this tart as anything greater than our evening's meal. And so, to be safe, let me emphasize the essential parts of my hastily-scribbled instructions; sticky caramelized onions line a butter-laden crust, profoundly rich and yet well-matched by a smear of sharp, young cheese. Atop that are tiles of eggplant, zucchini and tomatoes, softening into each other, lush with their juices.

The final effect is one of substance without brawn, something so good that I had to share.

Happy weekend.

Late Summer Vegetable Tart
My adaptation of recipes from Rachel and Heidi, with thanks. The amounts and particulars below for the filling are a non-specific guideline. I was working with what we had on hand, but feel free to make omissions and substitutions to best suit your tastes (and contents of your fridge).

Ingredients
1 medium eggplant, cut into 1/4-inch slices
1 medium zucchini, cut into 1/4-inch slices
1 large onion, sliced thinly
2 shallots, sliced thinly
2 cloves garlic, minced
2 tablespoon white balsamic vinegar
1 teaspoon fresh thyme leaves picked from their stems, plus more for garnish
2 beefsteak tomatoes, cut into 1/4-inch slices, I used a mix of varieties and sizes
4 ounces herbed unripened goat's cheese
Parmesan cheese (an ounce or so)
Fresh mozzarella (around 1/2 a large ball)
Good quality olive oil
Kosher salt and freshly-ground black pepper

1 9-inch pastry shell of your choice, partially baked (see note)

Preheat oven to 425°F (220°C).

Take the eggplant and zucchini slices and toss in a large bowl with a generous sprinkling of salt. Transfer the slices to a colander and leave to drain.

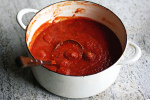
In a medium skillet over medium-low heat, cook the onions and shallots in bit of olive oil, stirring occasionally. After about 20 minutes, or when the onions and shallots are lightly-caramelized and starting to catch in places, add the garlic. Cook for about 3 minutes more, so that the garlic has chance to mellow and soften. Pour in the vinegar to deglaze the pan, scraping and the bottom of the skillet with your spoon to pick up any brown bits. Cook for a minute or so, until most of the vinegar has evaporated. Remove the vegetables from the heat and stir in the thyme. Set aside.

Pat dry the eggplant and zucchini on a (non-terrycloth) kitchen towel. Coat the eggplant, zucchini and tomatoes in olive oil lay them out in a single layer on baking sheets. Season all with pepper, the tomatoes with salt too. Roast vegetables in the preheated oven, working in batches, until the vegetables are just beginning to brown in spots, around 20 minutes. Although the tomatoes were too delicate for such a procedure, I flipped the eggplant and zucchini over halfway through roasting. You want them tender, but not falling apart.

When the vegetables are done, remove from the oven and turn down the temperature to 350°F (175°C).

Beat the goat's cheese in a small bowl, with a drizzle of olive oil if needed, until creamy. With an offset spatula, spread the cheese over the parbaked pastry crust. Layer in the caramelized onions, then the eggplant, next the zucchini, and finally the tomatoes. Tear the fresh mozzarella into rough chunks over all. Using a vegetable peeler, shave a few large, thin shards of Parmesan on top.

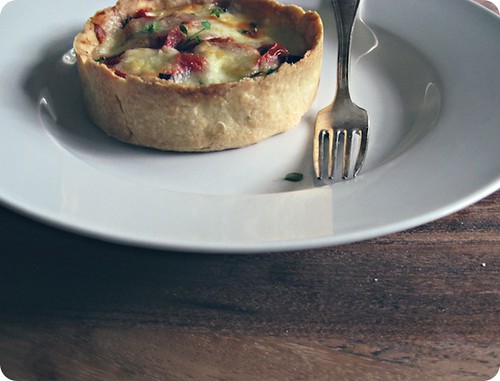
Bake in the preheated over for 30 minutes, until the cheese is melted and beginning to brown. Allow to cool for a few minutes before serving, with a sprinkling of fresh thyme leaves to finish.

Makes 1 9-inch tart.

Notes:

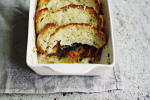
• Yesterday I used an all-butter pâte brisée from Martha Stewart, making the full recipe and sending a second tart off to loved ones. I did make one change, using 1 tablespoon of vinegar (in this case white balsamic, usually apple cider vinegar) in place of an equal amount of ice water. I also make this crust with 1/2 cup of whole wheat flour instead of using all white.
• This was especially good the next day, gently warmed and served with a soft-yolked fried egg for brunch.

Thursday
Aug202009

Over and through

A few days ago, early last Saturday morning to be precise, Sean and I had a complete breakdown in communication.

We were at the Farmer's Market, me with one perched on my hip and another clasping my hand, and Sean across the way. It was a busy morning, so while our boys snacked on their standard sample from the nearby bakery, Sean waded into the current of people to gather our purchases.

Usually, our over-and-through-the-crowd brand of semaphore works a treat. This time, not so much. With all the hustle and bustle, our signals got crossed and the quantities of our request was lost in translation. Long story short, we ended up with a surfeit of corn. Double the intended amount, to be exact.

Not a terrible mistake, by any means, as the corn in question was fresh, local stuff, with neat rows of bicoloured kernels nestled snugly under tender green husks. Not terrible in the least.

A first impulse would be to tear back that blanket of green and roast the Dickens out of those ears atop a charcoal grill. Blistered black and concentrated sweet, I would gleefully dig in to the barbecued beauties. Or steamed tender-crisp, with a smear of sweet butter and scattering of crunchy flakes of salt - there were days of possibilities for our plenty.

The trouble was, more than a few of those possibilities included the application of heat. And did I mention to you that Summer huffed and puffed our way last week? With sweaty palms and hot breath, the season (finally) truly settled in on the 15th of August. And, no doubt about it, Summer is making up for lost time.

As I write this, it is 40°C with the humidex (104°F). While I am not all that bothered by the temperatures, by far preferring hot over cold, my boys are wilting more than a little bit. The heat has kept their mops eternally mussed, their ruddy cheeks shine with a thin sheen of perspiration and their kisses have turned salty.

You can understand then, that I am not in the least inclined to crank up the oven and overheat our happy home or add any fire to our already-sultry backyard.

As luck would have it, a little while prior to our misunderstanding at the market*, I had enjoyed this salad from Anna Olson. Served at her shop, it was subtle and sweet, but my version alters hers ever so slightly; here, there is oomph to be had.

Stripped from the cob, plump gold and ivory nuggets glisten with a slick of olive oil in a pan for nothing but the shortest of sojourns, then it's a tumble with an edible confetti of shallots, chili, green onion and herbs. The blueberries are next, an addition that brings musky depth and even more mouth-quenching moisture. Squeeze on some lime, crumble over brackish nuggets of fresh cheese, and off it all goes to chill.

In the intervening minutes between mix and serve is when everything happens. The corn turns sweeter, it's flavour amplified by the citrus and complimented by berries that shimmer onyx-bright. Fresh onion contrasts mellowed, cooked tones, the chilies release gentle heat into it all.

May all misunderstandings result in such dividends.

* It might just be the temperature finally getting to me, but doesn't The Misunderstanding at the Market sound like the title to an Agatha Christie mystery? Or at least a Harlequin romance novel?

Blueberry Corn Salad
Adapted from a recipe by Anna Olson. Queso fresco is a fresh Mexican cheese that has a mild, creamy taste.

Ingredients
2 tablespoons extra virgin olive oil, plus additional for drizzling (optional)
3 cups fresh corn kernels (about 4 ears)
1 large shallot, minced
1/2 cup chopped green onion
2 red chilies, finely minced, seeded if desired
1 1/2 cups fresh blueberries
1/2 cup fresh cilantro leaves, chopped
2 tablespoons lime juice
1/2 cup crumbled feta or queso fresco
Salt and freshly ground black pepper to taste

In a large sauté pan over medium high heat, add the olive oil, then the corn. Sauté for about 2 minutes, until the corn begins to brighten in colour. Add the shallot and cook for 1 minute more, stirring often. Remove pan from the heat, stir in the green onion and red chilies. Season to taste with salt and black pepper. Allow the vegetables to cool to room temperature.

In a large bowl, combine the corn mixture with the blueberries and cilantro tossing gently to combine. Pour over the lime juice, along with an extra glug of olive oil if desired. Stir again, then gently fold in the feta or queso fresco. Refrigerate for at least 1 hour, checking for seasoning before serving.

Serves 4.

Thursday
Jul232009

Just you wait

I know that I am more than late for our usual Thursday chat, but please forgive my tardiness. Due to an oversight on my part, our guest of honour was not ready for their debut. But finally, the wait is over.

The pickles have arrived. And what pickles they are. But before I tell you about their end, let me tell you of how they came to be.

At the market last weekend, I overheard a farmer describing the progress of his crop. Speaking in glowing tones that were more than tinged with pride, he detailed the specific traits of each of his vegetables; how they grew, their likes and dislikes, their particular qualities. He had a quiet intensity about the way he spoke, an enthusiasm that shone through his words. It was evident that the subject matter was of the utmost importance - more than a livelihood, but a passion as well.

There's just one of the many reasons why he's our Regular Vegetable Man.

On that same weekend his summer squash was especially fine, slender and small, with delicate, taut skin that was perfectly blemish-free. I do not know what it was that sparked my idea of pickling these little darlings, but a pickle was my particular plan. It was a surprising choice, as my usual tendency is to grill, griddle, or roast. But a pickle seemed the order of the day, the promise of crisp, cold slices of squash, puckery and astringent had me salivating. As a good pickle should.

Five days after salting, boiling and sealing the jars tight, I opened the fridge with fork in hand and anticipation in my heart.

That's the thing about pickles, they require faith. Commitment. They take their own sweet time. You do what you can to set things in motion, but that is where your influence ends.

What you put in the jar is as acrid and overblown, eye-twitchingly sour. But wait, just you wait, this is only the beginning. From there, the pickle really takes care of itself. The wait is transformative, and what happens inside that glass coccoon is entirely out of your hands. But your patience will be duly rewarded.

And rewarded I was. After those days, the vinegars had mellowed and muted, now balanced with a sweetness that is first to the tongue. The heat follows, with the indisputable zing of acid to finish.

I wonder if our Vegetable Man might like a jar.

Bread and Butter Pickled Summer Squash
Inspired by a recipe from Simply Recipes. As these are meant as a refrigerator (chilled) pickle, they are not processed after being canned. Please see the link above for valuable tips on sterilizing and, if you so choose, how to process pickles so that they are shelf-stable.

Ingredients
2 pounds mixed summer squash, cut into 1/8-inch slices (I used yellow summer squash and zucchini)
1 medium white onion (about 8 ounces), halved and thinly sliced
2 heaping tablespoons kosher or pickling salt
2 cups ice cubes
2 cups cider vinegar
1 cup white vinegar
2 1/4 cups sugar
2 teaspoons whole mustard seeds
3/4 teaspoon celery seed
3/4 teaspoon whole black peppercorns
1/4 teaspoon turmeric
1/2 teaspoon crushed red pepper flakes
1/8 teaspoon or a good pinch of ground cloves

Toss squash and onion with salt in a large colander set over a bowl. Add ice, toss again. Refrigerate, tossing occasionally for 3 hours. This process will increase the crunch of the pickles by drawing out excess water. Once the 3 hours have passed, drain the squash, picking out any ice cubes that might remain. Rinse well and drain again.

Bring vinegars, sugar, mustard and celery seeds, peppercorns, turmeric, red pepper flakes and ground clove to a boil in a saucepan. Add the drained squash and onion. Ladle into 4 hot sterilized pint jars, leaving about 1/2 inch below each jar's neck. Carefully wipe rims of jars with a clean, damp cloth. Cover tightly with new, sterilized lids and screw tops. Cool to room temperature, then store in the fridge for 3-5 days before opening.

Makes 4 1-pint jars, to be eaten within weeks of making.

Thursday
Jul162009

Not a moment's hesitation

I am not one to make quick decisions. I never have been. My paralizing inability to make snap judgements is a periodic subject of (loving) mockery amongst those who know me best.

When going out to dinner, I might be inclined to sneak a glance at menu in advance, just to be well-versed in my options. (But then, my best-laid plans are frequently set aside as soon as the specials are announced). Suffice it to say, I am a planner, a ponderer. A girl who likes to know her options.

But in regards to certain things, special things, passion overrules reason and I have my answer ready before you've finished the question. Unsurprisingly, considering my fixation with breads, bagels are one of those things.

In my mind there is but one city that can claim the crown of bagel-making supremacy, and that is Montreal, Quebec, Canada. Full stop. No equivocation. Not a moment's hesitation.

Montreal is home to the best bagels around. There, I said it.

Bring it on New York. I'm ready for you, Toronto. As far as I am concerned, Montreal's bagels are a thing unto themselves, a whole other (perfect) incarnation of bagel. And although I hasten to mention I've not had many bagels overseas, I'm nonetheless willing to cross my heart and raise my right hand to pledge my allegiance to those from the town where I was born. And no, I will not admit a trace of bias there.

I cannot overstate the lure of a freshly-baked bagel from one of the many storied shops in Montreal. To truly understand their greatness, I implore you, get thyself to la belle province as soon as possible and experience them firsthand. You'll thank me later.

In the off chance that you are not willing to take me at my word, let me count the ways that Montreal's bagels are the so divine.

They inspire devotion. Example; I used to know someone whose job would take him from Toronto to Montreal on a fairly-regular basis. On those glorious days when he would return, those waiting for his arrival would set upon him almost immediately, hungry for their fix. Setting upon the nondescript brown bags he held in his clenched fists, they would tear them open, their contents would spill across out, sesame seeds scattering everywhere.

I was one of those people. Sometimes I would stash an extra bagel in my purse to take home. I'm not proud of that fact, but it is true.

The inspire gluttony. Even though nobody, save myself, was "much in the mood for bagels" when I set about baking, our batch of 24 was gone in 48 hours.

You see, Montreal bagels are not the billowing cotton-ball, bite-down-on-a-pillow, overgrown mass of tasteless fluff that so many bagels are these days. These bagels are ropey and irregular in their looks, skinny limbed and gorgeously misshapen. Before baking, the bagels are dipped in a honey-laced bath, the sweetness reinforcing the trace of malt syrup in the dough. They are studded with seeds, sesame or poppy, before being torched in requisite wood-fired ovens. Those seeds get scorched in spots, turning gold and brown, their nuttiness brought forth by the flames full throttle. The interiors are tightly crumbed, dense and chewy. There is no mistaking a these for a glorified roll.

Now which bagel shop in Montreal gets my heart? Don't get me started.

Montreal Bagels
While I do not have a wood-fired oven at home, these bagels are a close approximation of those from Montreal. From HomeBaking: The Artful Mix of Flour and Tradition Around the World by Jeffrey Alford and Naomi Duguid (Random House Canada, 2003). The ingredient list below is theirs, while the method is my interpretation of their instruction.

As the boiling and baking of bagels is a bit of a procedure, it is best to have all equipment at hand . When ready to begin, have a slotted spoon and baking peel (or a baking sheet to use as a peel) at the ready. Put the sesame seeds or poppy seeds on a large, shallow dish, and have a cooling rack nearby.

Ingredients for dough
2 teaspoons granulated sugar
1 cup lukewarm water
1 tablespoons active dry yeast
2 tablespoons wheat malt syrup (see note)
1/2 cup warm water
1 large egg, room temperature
1 tablespoon vegetable oil
2 teaspoons salt
About 4 cups all-purpose flour

Ingredients for shaping and topping
3 tablespoons honey
About 1 cup hulled sesame seeds or black poppy seeds or some of each

In a medium bowl, or the bowl of a stand mixer with the dough hook attached, dissolve the sugar in the lukewarm water. Stir in the yeast. In a small bowl, dissolve the wheat malt syrup into the 1/2 cup warm water. Stir in the egg, oil, and salt. Set aside.

If proceeding by hand, add 1 cup of the flour to the yeast mixture and stir to combine. Add the wheat malt mixture and then 2 more cups of flour and stir, always in the same direction, until a smooth dough forms. It will be quite moist. Add the remaining 1 cup of flour and stir to incorporate. The dough will be quite stiff. Turn the dough out onto a lightly-floured work surface and knead for 5-10 minutes, until it becomes smooth and elastic.

If using a stand mixer, add 2 cups of flour to the yeast mixture and mix on low speed for about 1 minute. Add the wheat malt mixture and the remaining 2 cups of flour, and stir on the lowest speed for 3 to 4 minutes. Turn out onto a lightly-floured work surface and knead briefly, until the dough is smooth and elastic.

Place the dough in a clean medium bowl and cover with plastic wrap. Let rise for 1 3/4 to 2 hours, until the dough has doubled in volume and is soft. Punch down the dough gently, recover and let rise for another 1 to 1 1/2 hours.

If you have one, place a baking stone or unglazed quarry tile (see note) on a rack in the upper third of the oven. Preheat oven to 450°F (230°C).

Cut the dough into quarters, working with one piece at a time and covering the remaining in plastic wrap. Divide the piece of dough into 6 equal pieces (weighing approximately 2 ounces each). Roll each small piece out into a skinny rope, around 10 to 12 inches long. Press down on the rope, rolling it back and forth under your palms against the work surface, pushing out and gently towards the ends. The dough is very elastic, shrinking back if overworked. It is easiest to work two ropes at a time, alternating between the two and allow each to rest in between.

When the rope is to the appropriate length, lay the dough over one hand, with one end across your palm and the other hanging free. Bring this second end across the back of your hand to form a loop, and bring the two ends together, overlapping by about an inch. Pinch the ends together, then bring them down under your hand against the work surface, rolling them together gently. Place bagel on a parchment-lined baking sheet and repeat the process with the remaining 5 pieces of dough. Cover with a cotton cloth and let stand for 15 minutes.

Meanwhile, bring 8 cups of water to a gentle boil in a wide 4-to-6-quart pot. Add the honey and stir to dissolve. Gently slide 3 bagels into the boiling water; they may sink for a moment, but should break the surface within 10 seconds. Use the back of the slotted spoon to gently press the bagels back under the water now and again, letting them boil for a total of 45 seconds. The should be slightly puffed. Remove the bagels using the slotted spoon and move them directly to the sesame or poppy seeds. Roll and press the bagels into the seeds, coating well, then place them on your baking peel or a parchment-lined baking sheet, leaving about an inch between them. Repeat the process with the remaining 3, placing them beside the first 3.

Bake for about 8 minutes on the baking stone or parchment-lined baking sheet, then use a long-handled spatula to turn them over and bake for another 5 to 7 minutes, until golden brown.

As soon as you put the bagels in to bake, start shaping the next batch of 6. Remove the baked bagels from the oven to a cooling rack, allow the stone to recover for a couple of minutes, then bake the second batch. Repeat until all of the bagels have been shaped, boiled and baked.

Makes 24. Best eaten the day they are made, or can be split and frozen in a well-sealed freezer bag.

Notes:

• I do deviate from Alford and Duguid's direction regarding size, upsizing their bagels slightly from (when raw) 1 1/2 ounces to 2 full ounces. To follow their lead, cut the quarters of dough into 8 pieces instead of 6, resulting in 32 finished bagels.
• For those who do not have a baking stone, I remembered a tip from ages ago regarding the use of cast iron pans for pizzas. I tried the method, using my basic 10-inch skillet, to particularly fine results. Michael Ruhlman suggests inverting the pan, but I didn't. A flat top cast-iron griddle would be ideal.
• Wheat malt syrup is a grain product used in bread dough to assist in rising and to develop a deeper, more complex taste. Wheat malt syrup is available at specialty and natural food stores.
• A thorough discussion of Montreal's bagels can be found at Tasting Menu.

Thursday
Apr302009

A nibbly sort

Since early Monday and up until last night, I was in quite a mood. By early, I mean truly very early. And by quite a mood, I mean a doozy of one.

It might have been the fresh start of a new week, or maybe it was my recent birthday, but whatever the reason I have been in a clean-out-the-closets-get-rid-of-the-clutter-oh!-should-I-start-the-flower-beds-there-is-laundry-to-be-folded-hey!-does-that-window-need-cleaning-air-out-the-curtains sort of mood. I felt like a squirrel riding the swell of a caffeine high, skittering between task to task, caught just between busy and absurdly frantic. More often that I would like to admit I veered recklessly into the latter category.

What finally brought this careening momentum to a halt was, to the surprise of no-one I'm sure, food. A nibbly sort of snack, the most modest of things really. Scorch-grilled bread, a mound of oven dried tomatoes, creamy bocconcini, and a healthy spoonful of lemony, herby, capery, chili-spiked olive oil was enough to stop me in my tracks.

All laid out on a big plate, it was the sort of thing to be lingered over.

A combination of flavours and textures well-suited to this in between time when Ms. Spring can still be a tad temperamental; substantial without being heavy. Rich and unctuous, creamy and mild, astringent and fresh - all piled together on top warm, crusty slice of garlicy bread.

True, I am one that would happily munch on my left shoe if it was topping a fat wodge of freshly-baked bread, but take my word, this is something rather good. Put down the to-do list and pass the wine.

Cheers.

Lemon and Parsley Sauce
A pared-down, rustic variation of the Italian classic, salsa verde. This recipe is for the amount I needed for our snack, but the (estimated) quantities are intended as only a guideline. You can also add some toasted pine nuts and plumped up raisins for a sauce to serve over griddled slices of salty haloumi.

Ingredients
3 tablespoons chopped flat leaf parsley
1 tablespoon capers, roughly chopped if large
1-2 anchovy fillets, minced (optional)
Zest of one lemon, cut in thin strands
2 tablespoons freshly-squeezed lemon juice
6 tablespoons extra virgin olive oil
1/8-1/4 teaspoon dried chili flakes
flaked sea salt and freshly ground black pepper

In a small bowl, combine the parsley, capers, anchovy fillets and lemon zest. Stir in the lemon juice. Slowly add the olive oil until you have a loose, chunky vinaigrette. Check for the balance of acid to oil, adjusting if needed. Season to taste with chili flakes, salt and pepper.

Makes around 1/2 cup.

Oven Dried Tomatoes

Making oven dried tomatoes is hardly new and not at all demanding, but the results are so rewarding it garners another mention. They are juicier than sundried, with a texture I far prefer. You can also control the level of roasting to best suit your needs, which is a bonus, and slow roasting coaxes a bit of summer sweetness from the hothouse varieties available to those of us waiting for local field tomatoes.

I basically use Nigella Lawson's recipe for Moonblush Tomatoes, with a few changes:

• I use fresh thyme instead of dried and add a few grinds of black pepper.
• More often than not I add a head's worth of unpeeled garlic cloves to the pan.
• Upon putting the tomatoes in to roast, I turn the oven down to 350°F (175°C). After about 10 minutes, I turn the oven off and leave the tomatoes to finish drying. Keep in mind that the total roasting time will depend on the size of tomatoes you use. Rarely do I leave them overnight.
• I often make these after baking bread, to take advantage of the already-heated oven.