Instagram Instagram

Entries in recipe (119)

Wednesday
Jun292005

The essence of home

I’ve been putting off writing this post. The topic seemed simple enough, but whenever I tried to come up with an answer to the question, I was overwhelmed.

“What does Canada taste like to you?”

Deciding on one taste that most embodies the Canadian experience is, in my opinion, nearly impossible. With a country of such physical size and cultural contrasts, to concentrate on one flavour would be to exclude the thousands of other culinary adventures there are to be had.

To me, Canada tastes like maple syrup on my father’s French toast. I think of a butter-drenched crab boil on one coast, and Asian-influenced seafood on the other. Summer evenings wandering the streets of Montréal, shopping for decadent Opéra cakes. The requisite hotdog from Toronto street vendors. Breakfast cooked over a campfire, with smoky bacon and biscuits baked in a cast iron pan.

Canada tastes as sweet as summer fruit, as hearty as pierogies and as complex as our world-renowned wines. Canadian food reflects our varied climates, our landscapes and our seasons – it is the expression of the way we have created communities in this immigrant nation, and suggests the direction of what is to come.

Despite my travels, I would wager to say 85% of all the meals I’ve ever eaten have been in Canada. Seeing that I’m now somewhat obsessed with food, my food adventures this country surely have been nothing short of inspiring. Though I am itching to continue to travel the world and try new things, Canada will always be home to me. There is enough to explore down the street, throughout the province and across the nation to sustain me for years to come.

Maybe it would be easier if I concentrated on what Canada Day tastes like to me?

That’s easy. Growing up in a city on the edge of Lake Ontario, Canada Day meant one thing, and one thing alone – the annual Lion’s Club carnival. Every long weekend for the summer, the Lion’s Club carnival would make its rounds through local fairs and festivals throughout our region. And Canada Day was when it would come to my city.

Along with the other kids in our neighbourhood, I would watch the workers set up the tilt-a-whirl, Ferris wheel, and midway down by the beach. Soon enough, you could smell the popcorn and the air would become heavy with the sweetness of cotton candy. Twinkling lights would greet nightfall, and we would wait for the inky blackness to blanket the lake completely – setting the stage for the evening’s fireworks display.

Inspired by those memories, I’ve created miniature sweet wonton cones filled with icewine-macerated strawberries. The strawberries come from a nearby farm, the wine from a winery down the highway, and the wontons are my nod to Canada’s distinct cultural heritage. It is seasonal, the ingredients are local, and there is a bit of kitschy humour – how very Canadian. And red and white on Canada Day - how can you go wrong?

For an explanation of icewine and its production, click here.

Icewine strawberries in sweet wonton cones
My own creation, with apologies to Thomas Keller

Ingredients
1 pint strawberries
1/4 cup icewine
1 cup clarified butter
16 x 3 1/2” square wonton wrappers (4 are in case of mishap – and anyway, that is what my package contained)
2 tablespoons granulated sugar or Demerara sugar

Sweetened whipped cream, to serve

Speciality utensils
12 conical shaped metal forms (the type used for kulfi will do) or conical paper cups for water dispensers

Preheat oven to 350°F (175°C).

Hull and slice the strawberries, taking into account the size of your cone forms. Add the berries to a bowl and add the icewine. Stir lightly to combine, and refrigerate for at least two hours.

On a baking sheet, set out the metal forms or the paper cups. Brush each wonton on both sides with clarified butter. Wrap wonton wrappers around the cups to form cones, making sure to press the seams together. Twist the bottom to secure the point, if necessary. Lightly dust the cones with the granulated sugar, and bake for 7 minutes or until golden brown and crispy. Allow to cones to cool and remove from forms.

To serve, mound some of the macerated strawberries into your sugared cones, and top with the whipped cream.

Notes
• I used an Inniskillin 2002 Riesling Icewine for this recipe, thinking the floral apricot notes and bright acidity would complement the strawberries. Any icewine you enjoy would be suitable, or even a late harvest Vidal would be a great substitution, offering a bit of spice and sweet peach flavours.
• For Ontario readers, the LCBO does offer icewine in small bottles (a bit larger than hotel room minis). This size would be perfect to splash on a few berries, and are reasonably priced.
• I chose not to add sugar to the berries, but you may want to check for sweetness and add sugar accordingly.
• For the photograph, I used a non-sugared cone. It was terribly humid that day, and sugar was melting into a sticky mess. However, I would not suggest skipping this step as the wonton seems too savoury without this bit of gilding.
• The next time I make these cones, if I'm feeling particularly industrious that is, I think I would experiment with a tuile cone instead - if anyone experiments, please let me know!

Thursday
Jun092005

Butter + sugar + heat = bliss

I’ve not cooked a meal since last Sunday. And that was pasta.

Between assembling, reheating, and opening takeout containers, I’ve not had to do any “real” cooking, as in I’ve not turned on a burner or the oven. True, the 33°C temperatures may have a bit to do with my recent affinity for salads, but still, how lovely it is to be able to throw together a meal with such wonderful produce at hand, great restaurants nearby, and lovely family members all too willing to cook.

I’ve had the privilege of considering cooking a luxury – not a necessity or a chore, but an activity I could choose to do when the spirit so moved me.

I finally turned the oven on this evening, and for nothing short of a worthy cause; baking. The ultimate in indulgence, baking sweets speaks immediately to images of celebration, of comfort and of joy.

Baking always seems alchemy to me; the magic process of taking ingredients, combining them in a certain order in specific proportions, exposing this creation to heat — and voilà, a result much greater than the sum of its parts. Baking is all about transformation. One cannot help but feel a surge of pride when presenting a still-warm treat from the oven.

These cookies, crispy and chewy, like a good cookie should be, are as basic as one could wish for. Sinfully buttery, sublimely sweet, they melt in your mouth and leave you reaching for another. Based on the Nestlé Toll House recipe, swapping flavourings for dried cranberries or cherries, toffee bits, or dark chocolate chunks is highly encouraged.

So I’ve baked. I’ve rolled up my sleeves, faced a hot kitchen and even licked a spoon. I feel terribly domestic.

I should confess though, I’m having a salad for dinner.

White chocolate macadamia nut cookies
Based on the Nestlé Toll House recipe

Ingredients
2 1/4 cups all-purpose flour
1 teaspoon baking soda
1 teaspoon salt
1 cup butter, softened
1/2 cup granulated sugar
1 cup packed brown sugar
1 teaspoon vanilla extract
2 eggs
1 cup white chocolate, in chunks (or more, if desired)
1/2 cup lightly toasted macadamia nuts (or more, if desired)

Preheat oven to 325°F.

In a small bowl, sift together flour, baking soda and salt. In the bowl of a mixer fitted with the paddle attachment, or by hand, beat together butter, sugars and vanilla, until the colour turns pale and the mixture lightens in texture.

Add eggs, one at a time, beating well after each addition. Gradually beat in flour mixture. Stir in chocolate and nuts. Drop rounded teaspoons onto ungreased baking sheets (I use a small icecream scoop and parchment lined baking sheets).
Bake for 9-12 minutes, or until golden brown. Let stand for 2 minutes, then remove a wire rack to cool completely.

Makes 3 dozen cookies.

Notes
• This dough freezes quite well, so I usually portion out cookies and individually freeze them on baking sheets. When hard, I transfer them to a freezer bag— then I can make as few or as many as I’d like, without having to defrost the whole batch.

Wednesday
Jun012005

À la mode

There has always been the need to eat; but somewhere along the way we discovered the notion of eating fashionably.

One of my greatest pleasures in my older cookbooks is to see the evolution of tastes through their pages. As Donna Hay put it in her book Modern Classics, Book 1, “What macaroni and cheese was to me, risotto will be to the children of today when they come adults doing the cooking in the future.” I find that idea fascinating; the way that foods, like any cultural phenomenon, move from innovation to trend, ending up in either the fad or classics category. We’ve all watched cuisines, techniques and specific flavours move in and out of the limelight.

The three books pictured in my inaugural post were all ones stolen from my Mother’s collection. Spanning 32 years, these publications chronicle an amazingly rapid progression of tastes, all promoting the au courant menus of the moment.

The oldest, The Ogilvie Cook Book (Ogilvie Flours Mills Co., Limited, 10th edition, revised 1957) promotes itself as “a liked and respected friend of our modern homemakers.” Truly the must-have guide to home entertaining, it includes Appetizer Rolls made with Velveeta Cheese, undiluted condensed soup, bacon and Parker House rolls; Extra Good Homemade Chili with cayenne, salt and pepper as the only seasonings; and Half Moon Bay Crabs served in homemade tin foil faux crab shells. Italian food is still an emerging cuisine for the North American household, while German specialties are mainstays and French cuisine is chic. Aspic and jellies figure heavily into multiple chapters.

I realize I sound tounge-in-cheek, but my interest in these recipes is sincere – the attention to detail and specificity of garnishes show evident care and a belief in these dishes. And though these may not be staples in my current repertoire, I respect what they represent to the homemakers of 50 years ago.

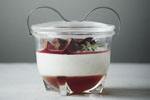
These mini cheesecakes are far from revolutionary. Simplicity itself, without much accoutrement or fuss – a soft vanilla centre topped with tart berries, presented in a crumbly crust. I remember when cheesecakes were all the rage when I was little – I am pretty sure I remember the first cheesecake I’d ever tried, one brought from New York by a favourite uncle. And though the humble cake may now be prominent on most chain-restaurant menus (and in the name of one chain in particular), in my opinion, its allure has not diminished.

My idea of a classic cheesecake
An amalgamation of recipes

Crust
1/4 cup butter, melted
1 1/4 cups graham wafer crumbs

Filling
24 ounces cream cheese (three packages), at room temperature
1 cup granulated sugar
3 eggs
1 tablespoon lemon zest (optional)
2 teaspoon vanilla
Pinch of salt (up to 1/2 teaspoon)
1 cup sour cream
Fresh berries, chocolate or sauces to garnish

Preheat oven to 180°C (350°F).

Lightly butter bottom and sides of a 91/2-inch springform pan. In a small bowl, stir crumbs with butter until mixed. Press onto bottom of pan. Bake in centre of preheated oven until set, about 8 to 10 minutes. Cool completely. Leave oven on.

Meanwhile, using a stand or handheld mixer beat cream cheese until smooth and creamy. Slowly add sugar and cornstarch, beating well combined, scraping down sides of bowl as needed. Add eggs one at a time, beating after each addition until incorporated. Beat in lemon juice, vanilla and salt. Add sour cream and stir just until mixed.

Wrap the underside and halfway up the sides of the springform pan with a double layer of heavy-duty foil. Pour cream cheese mixture into pan. Set pan in a larger ovenproof dish. Fill larger dish or roasting pan with enough hot water to come about 1 inch up the sides of pan. Do not fill water higher than where the foil comes up the side. Bake in centre of preheated oven. After 45 minutes the cheesecake will not be completely set; keep the door shut to the oven and turn it off. Allow the cheesecake to rest in the cooling oven for about one hour.

Remove pan from water and discard foil. Run a thin knife around outside edge of cheesecake to release it from the pan. Cool in pan on a baking rack at room temperature for one hour. Refrigerate for at least three hours, preferably overnight. Garnish with fresh berries, chocolate, whipped cream or however desired.

Cheesecake will keep well refrigerated for several days or can be frozen.

Notes
• To make the mini version as pictured, use standard 24 x 1/2 cup capacity muffin tins. Double the graham cracker crust amounts and divide mixture between the tins. Bake for only 4-5 minutes to set. Ladle cheesecake mixture into each muffin tin, until about 2/3 full. Bake in a Bain Marie for about 12 minutes, or until just set (the sides will be dry, the centre still quite moist). Follow cooling directions as listed above. After chilling, invert cakes onto a baking sheet, then carefully transfer to plates. Garnish and serve.
• If garnishing with chocolate, sweetened whipped cream or a particularly sweet fruit, I sometimes cut the sugar down to 3/4 cup.

Thursday
May262005

Ode to a gourd, Cucurbita pepo

The zucchini (courgette) is sort of the wallflower cousin to the cucumber. Cucumbers are snappy, juicy and crisp when fresh; a cool addition to salads and sandwiches, or perfect with a sprinkling of salt and pepper. All the while, the zucchini stands by; plainer when munched on raw, mild-mannered and unassuming — but the one with greater potential, in my opinion.

Zucchini is best when it’s given a little extra attention. It’s the shy one of the family, but once you coax out its mystery, it opens up a world of possibility. Sure, I love a great dill or sweet pickle, but give me roasted zucchini any day. Cucumber bread? Yuck. Zucchini loaf? Heaven.

I love zucchini for its sweet creaminess, especially when offset by a spritz of citrus or a drizzle of good balsamic. High in potassium and vitamins A and C, zucchini are a staple on my grill and a frequent snack, fresh out of the fridge. They add body to soups and stews in the fall, compliment heavy roasts in the winter and light sautés through the warmer months. Truly this gourd is a powerhouse in the kitchen.

Usually relegated to the supporting cast, these little fritters are bundles of zucchini-goodness. Brightened by lemon zest, a fistful of herbs and spikes of red chilli, I adore them as a side to any grilled meat or as a tasty nibble all on their own.

Zucchini fritters
My amalgamation of recipes from Nigella Lawson, Martha Stewart and our own Domestic Goddess.

1 pound zucchini (about 2 medium)
Zest of one lemon (approximately 1 tablespoon)
1 small shallot, minced
1 small red chilli, minced
2 tablespoons finely chopped flat-leaf parsley
2 tablespoons finely chopped cilantro
1 teaspoon salt
1/4 tablespoon freshly ground black pepper
1/2 cup all-purpose flour
2 eggs, lightly beaten
Vegetable oil, for frying

Using a box grater or the grating attachment on a food processor, grate the zucchini. Place zucchini in a thin layer on a kitchen (or paper) towel. Cover with another towel, and leave to dry for approximately 30 minutes.

In a bowl, combine all the remaining ingredients, except for the beaten egg. While stirring, add the egg slowly and thoroughly combine. Gently fold in the dried zucchini.

Heat a few tablespoons of olive oil in a large frying pan over medium high heat. When the oil is hot, but not smoking, drop heaped tablespoons of the batter into the oil, flattening them slightly with the back of a spatula. Cook for about 2-3 minutes per side, or until golden brown and crisp. You can also tell when they are cooked by pressing slightly on the surface – the fritter should feel like a cooked pancake; firm but with a bit of spring.

Repeat until all the batter is used. Keep warm in a low oven, or serve at room temperature garnished with lemons and a scattering of fresh parsley.

Makes about 12.

Notes
• I usually use a tiny ice cream scoop to portion the batter.
• These are lovely served hot with a dollop of sour cream or sweet chilli sauce.

Tuesday
May242005

Summer school

I’ve been slacking, I know. This past week has gone by in a blur – an unexpected opportunity, some business that warranted my full attention, some family obligations; it was quite a week.

But really, these are all excuses. The real reason I’ve been slacking off is because it’s the Victoria Day weekend.

Victoria Day or, as it's more popularly known, May 24 (pronounced two-four), is a seasonal rite for most Canadians. This statutory holiday (celebrated in various degrees/forms across our nation) has grown since its inception to signify not only the birth of a queen, but also the unofficial start to summer.

As I’ve mentioned before, I’m not too fond of being cold — and our spring has been just that. Sure, we had days that flirted with the concept of spring; flowers bloomed, skies were blue, sun was shining, but few days were definitively spring-like. Most days were cold, grey and gloomy, bringing about thoughts of turtlenecks and fireplaces, rather than flip flops and daffodils.

And so, it was with great hope that I welcomed this year’s May 24 weekend. Come Friday evening, the exodus to cottages, cabins and campsites began. The city’s population deflated exponentially.

Traffic is part of the ritual, grocery stores crowded with people packing coolers is usual, fireworks stands at the side of the road are integral to the landscape of the weekend. Time for brains to check out, and relaxation to check in; plant yourself firmly onto a deckchair, and don't plan on moving until the long weekend is over.

Even though this May 24 was a mix of sun and cloud, warm and cold, I’m still optimistic. The inherent spirit of the holiday, the anticipation of summer, is intoxicating. A promise of warm evenings, the start of patio season, and flower-scented breezes is in my mind.

Not to mention the food. Winter weather food is about comfort, fall food is about bounty, and spring food is about freshness, whereas summer food is about mirth. Pared down dishes, but with personality — the fiery heat of chillies, cool citrus, sprightly herbs; menus are full of contrast, texture and brightness. One cannot help but be happy when eating summer food.

I made a quintessential May 24 dinner of burgers, but I’m wary to include the recipe. I was casually playing with the idea of a vaguely Mediterranean chicken burger, but it seems I was a tad bit too laid back. I produced under-seasoned results. I’ll fiddle, and post that recipe later.

Until then, here is the perfect toast to the season; spicy, tart, and utterly refreshing, this tea begs for long afternoons spent on the porch.

Lime ginger iced tea
My own recipe

1 cup water
1 cup sugar
3 inch piece of ginger, sliced
Zest of a lime, in large pieces
8 cups water
8 black tea bags, I recommend Earl Grey
Zest of a lime, in strips
Juice from one lime
1/2 cup cranberry juice

In a small saucepan, combine sugar, water, ginger and lime zest, and bring to a boil. Simmer the mixture over moderate heat, until the sugar dissolves. Remove from the heat and steep, about 10 minutes. Strain the mixture.

In a large saucepan, bring the water to a boil. Remove from the heat, add the teabags and steep for five minutes. Remove the teabags and let cool to room temperature. Transfer to a pitcher and refrigerate until chilled.

When ready to serve, add zest, lime and cranberry juices and stir in about 1/2 cup of the ginger syrup, or more to taste; refrigerate the remaining syrup for later use. Serve in glasses over ice, garnished with additional lime zest.

Notes
• You can also use a combination of black tea and Apple Zinger tea from Celestial Seasonings. I do not like to completely omit the black tea, as it adds character and a bit of depth to the drink.
• A splash or so of rum makes a welcome addition.